Install the Agrello Word Add-in and start sending documents for e-signature directly from Microsoft Word - step-by-step setup and usage guide.
The Agrello for Word Add-in lets you send documents for electronic signature directly from Microsoft Word. No need to switch between applications - prepare your document and send it for signing without leaving Word.
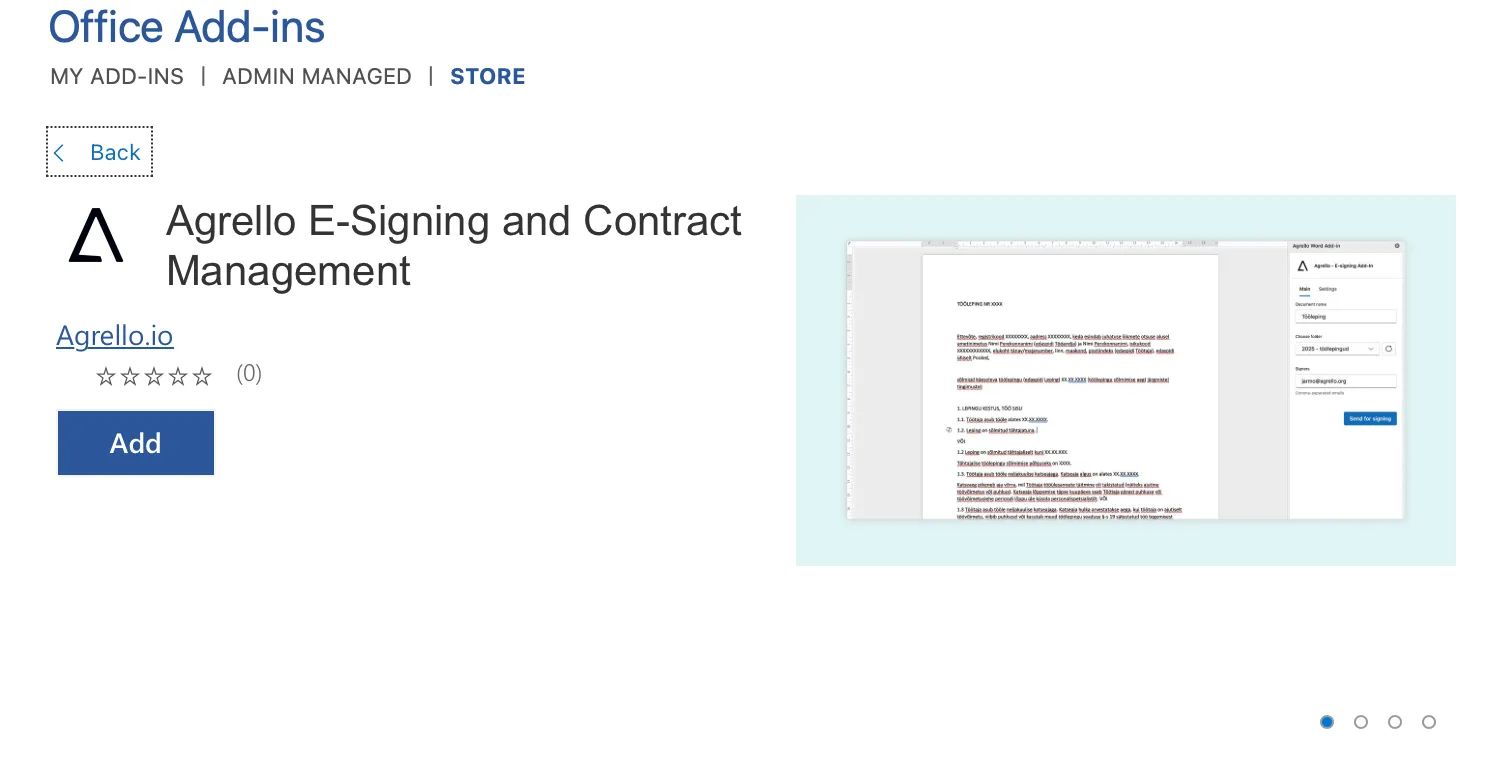
Installing the Add-in
- Open Microsoft Word
- Go to Insert > Get Add-ins (or Add-ins depending on your Word version)
- Search for Agrello in the Office Store
- Click Add to install
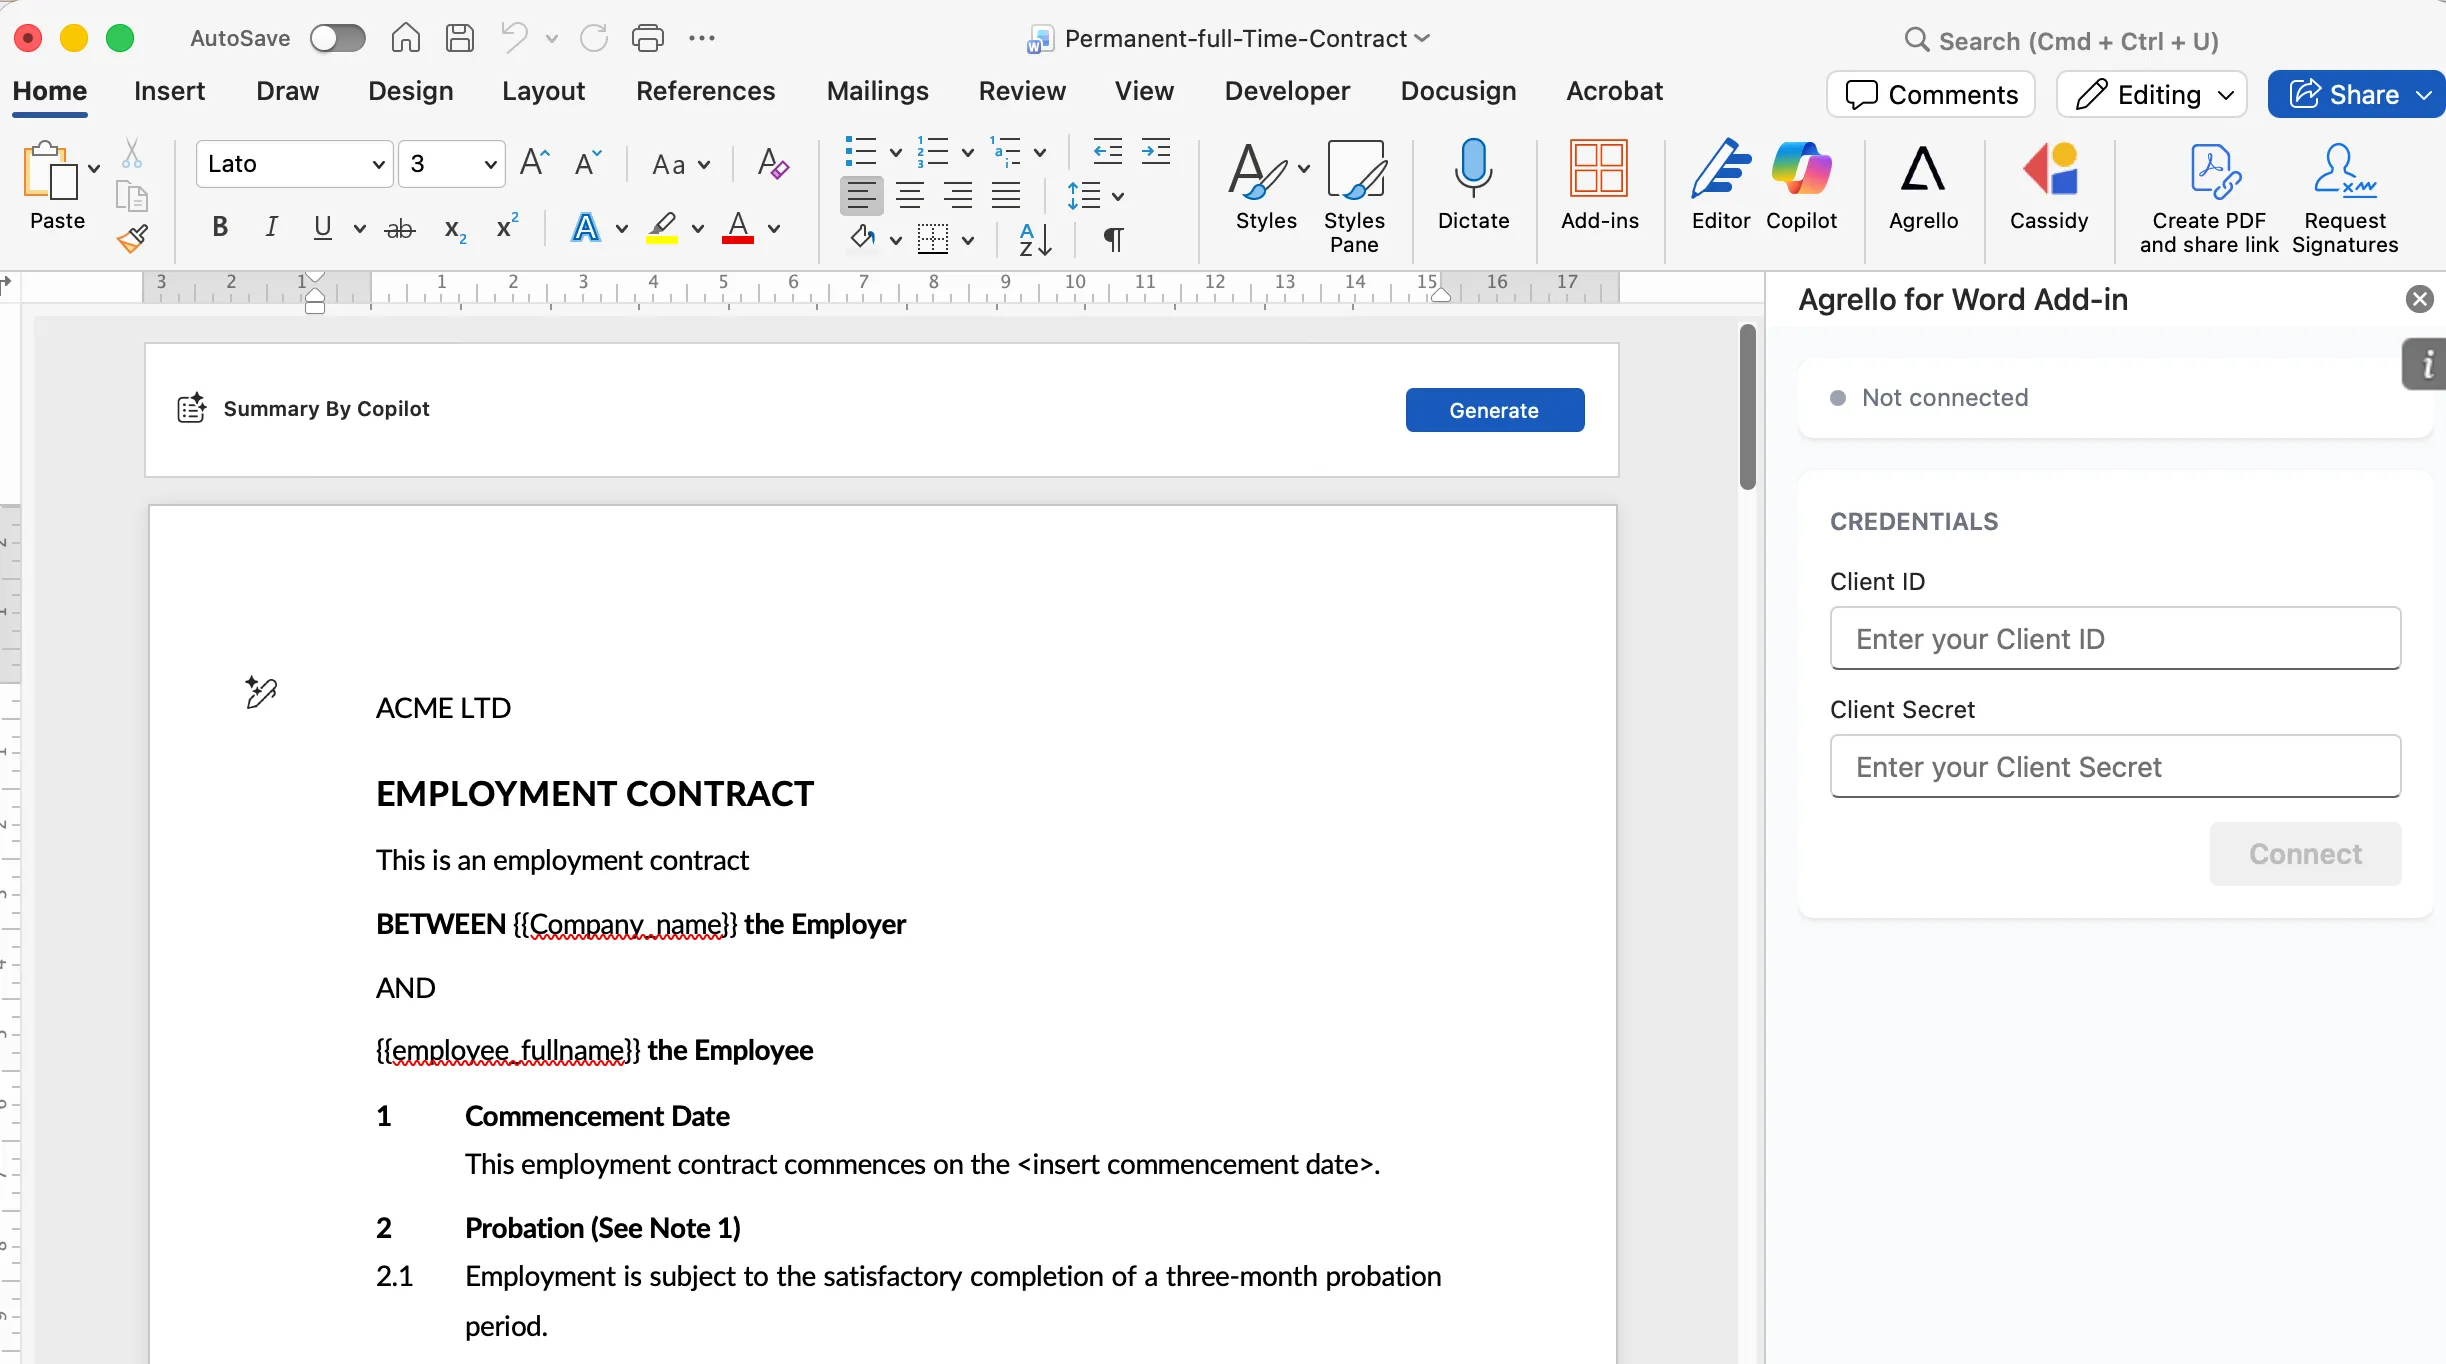
After installation, the Agrello button appears in the Home tab ribbon. Click it to open the add-in task pane.

Supported Office versions
The add-in works with:
- Word on Windows (Microsoft 365, Word 2016 or later)
- Word on Mac (Microsoft 365, Word 2016 or later)
- Word on the web (Edge, Chrome, Safari)
- Word on iPad
Setting Up Your API Credentials
Before you can send documents, you need to connect the add-in to your Agrello workspace.
Step 1: Get your credentials
- Log in to your Agrello account at docs.agrello.io
- Navigate to Workspace > API credentials
- Generate or copy your Client ID and Client Secret

Don't have an Agrello account? Sign up for free.
Step 2: Connect the add-in
- Open the Agrello add-in in Word (click the Agrello button in the Home tab)
- Enter your Client ID and Client Secret
- Click Connect
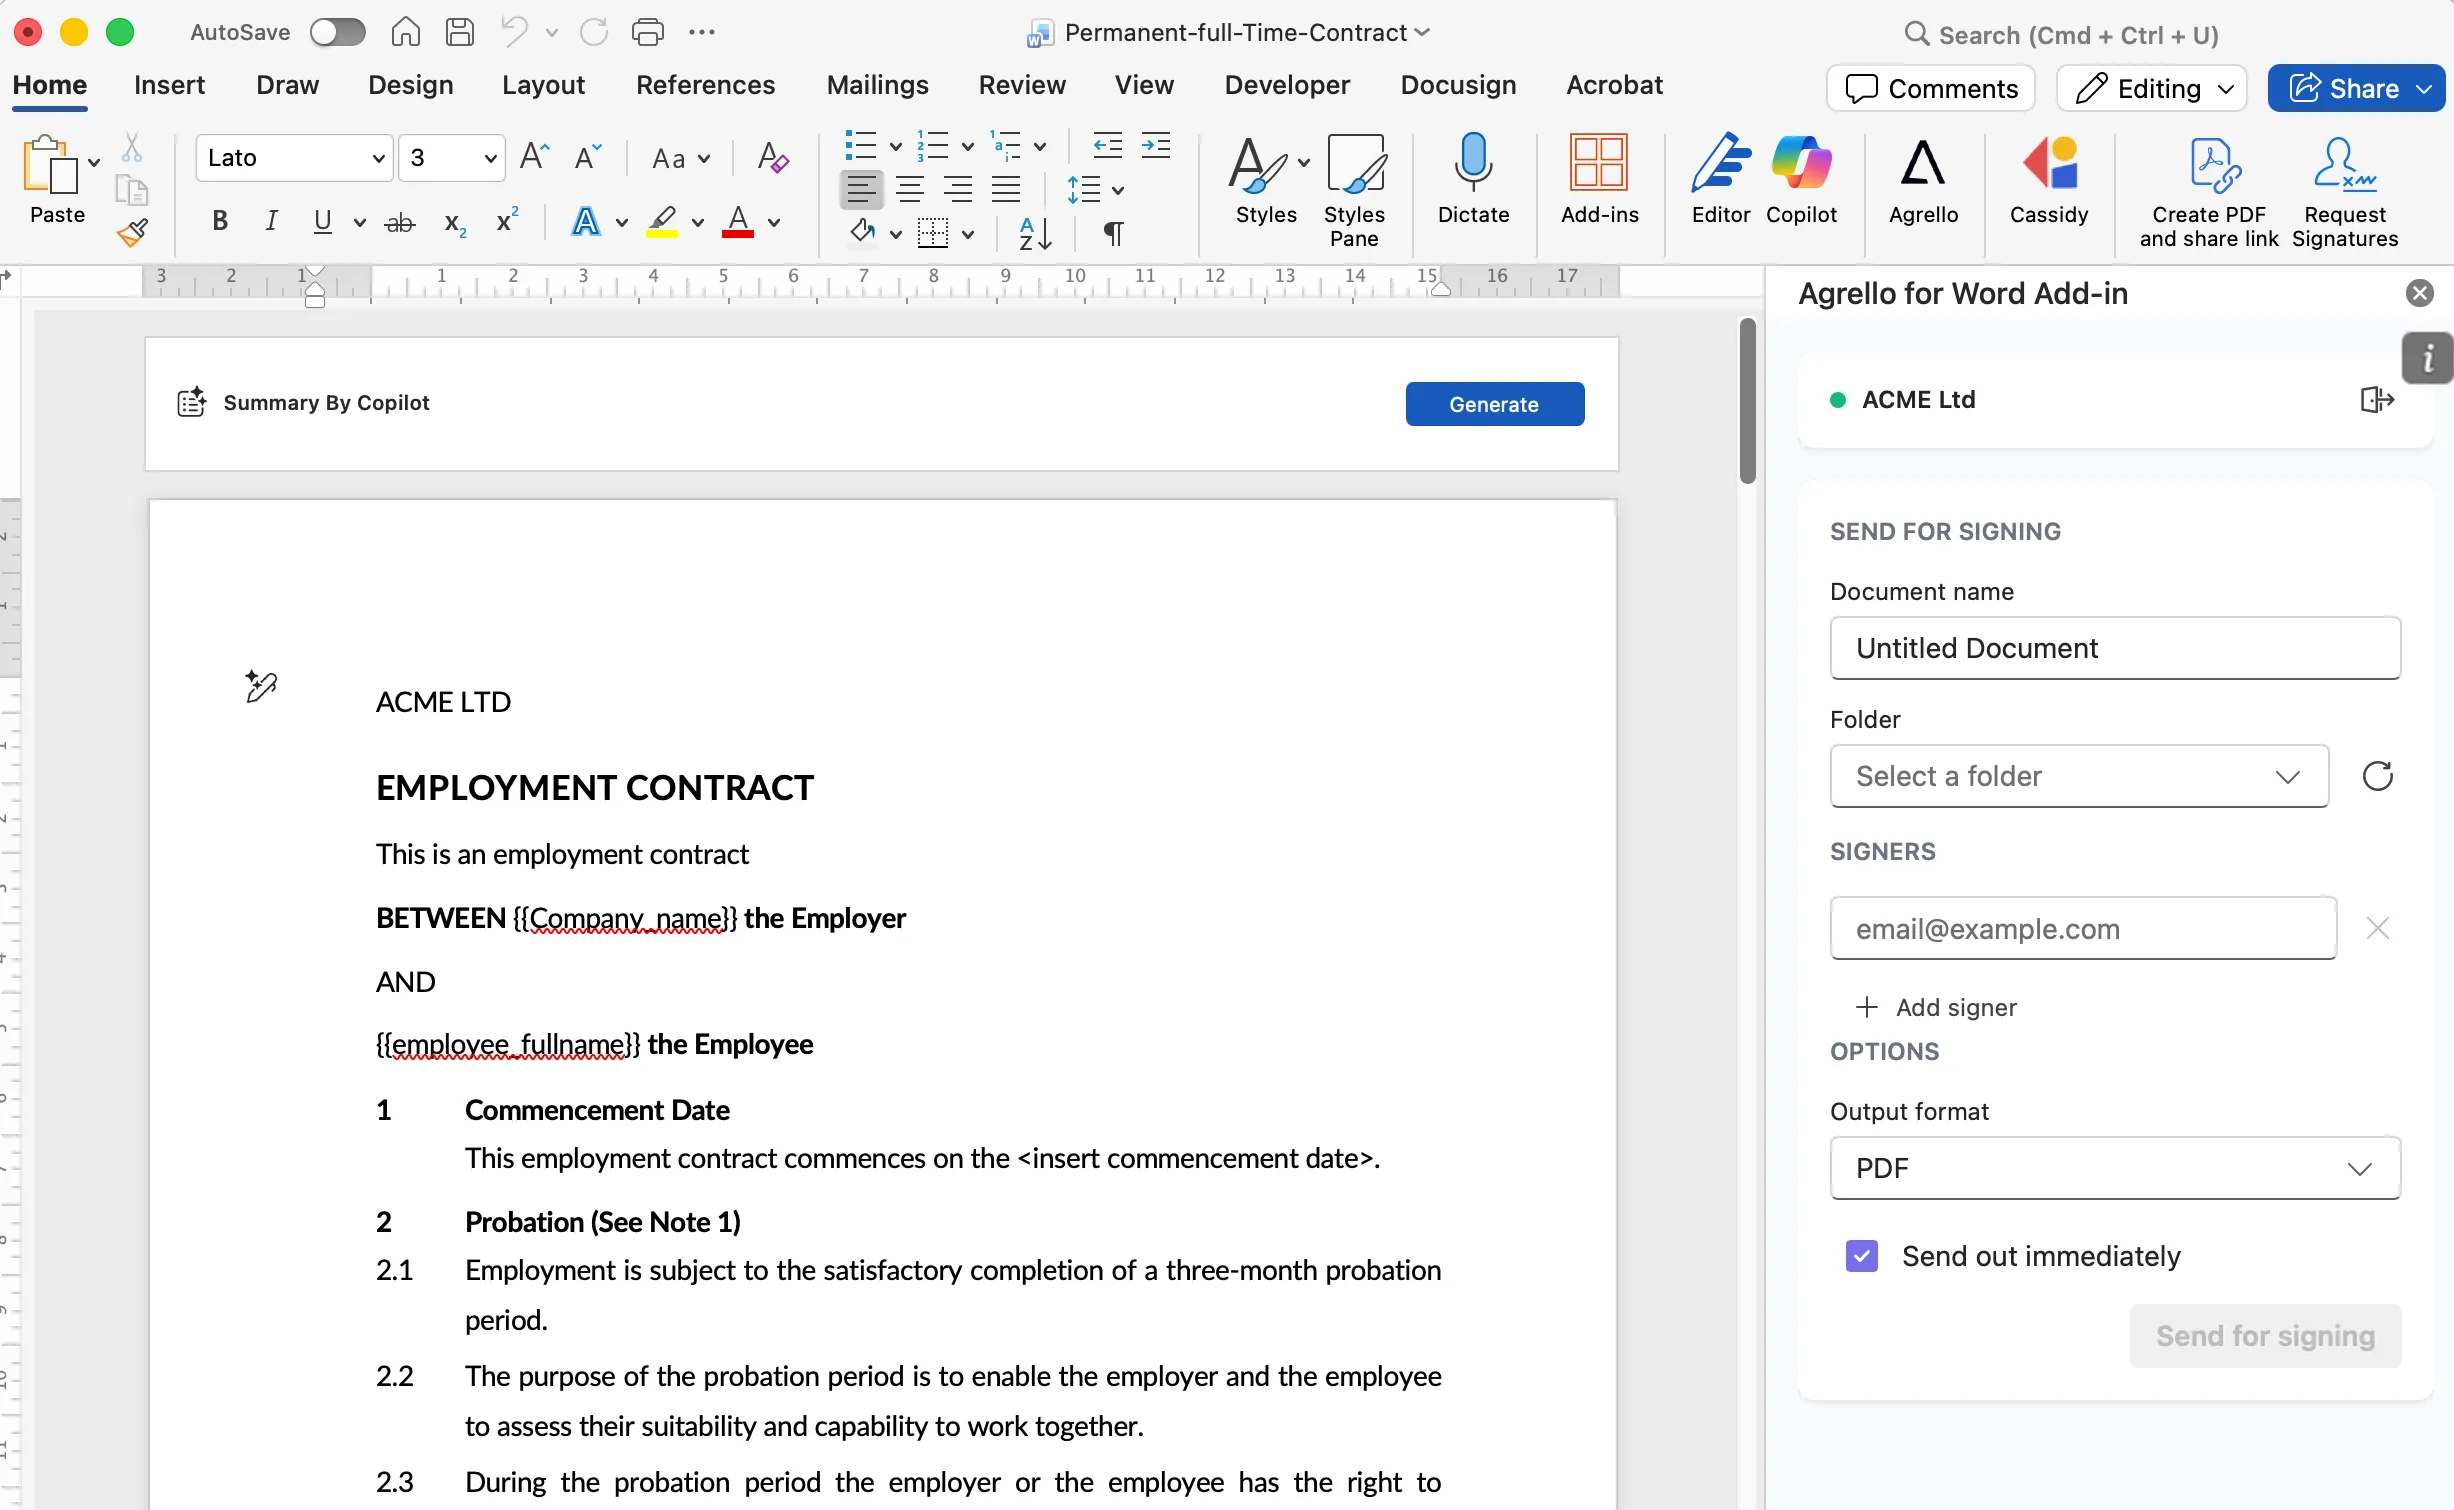
Once connected, your workspace name appears in the status bar at the top of the add-in. To disconnect or switch workspaces, click the sign-out icon next to your workspace name.
Sending a Document for Signing
Step 1: Finalize your document
Make sure your Word document is complete and ready for signatures before proceeding.
Step 2: Configure signing settings
In the add-in task pane, fill in the following:
Document name - Give your document a clear name.
Agrello folder - Select the folder where you want to store the document. Click Refresh to update the folder list.
Signers - Click Add Signer for each person who needs to sign. Enter their email address. Previously used addresses are suggested as you type. Remove signers with the X button.
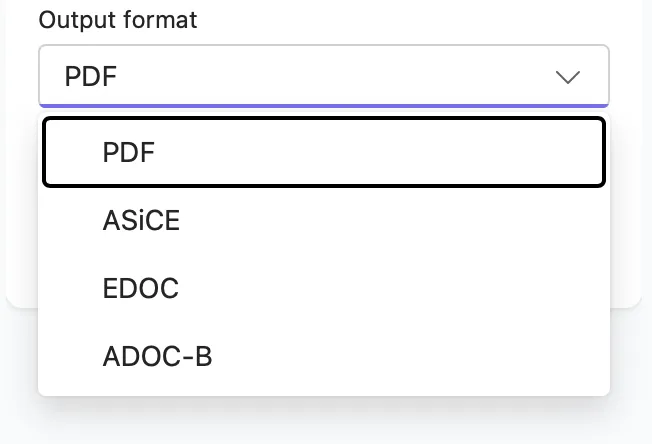
Output format - Choose the signed document format:
- PDF - Standard format for wider compatibility
- ASiCE - EU eIDAS-compliant container format
- EDOC - Latvian Qualified Electronic Signature format
- ADOC-B - Lithuanian Qualified Electronic Signature format
For more details on output formats, see Choosing the Right Output Format.
Send options - Toggle Send out immediately to send the document to signers right away. If unchecked, the document is saved as a draft in Agrello.

Step 3: Send for signing
- Review all settings
- Click Send for signing
- Wait for the confirmation message
- Click Open in Agrello to view the document in your workspace
Step 4: Track progress
Log in to your Agrello account to monitor signing progress. You'll receive email notifications when signers complete their actions.
Frequently Asked Questions
Do I need an Agrello account?
Yes. You need an active Agrello account with API credentials. Register for free.
What file formats does the add-in support?
The add-in works with standard Word documents (.docx). Your document is converted to the chosen output format (PDF, ASiCE, EDOC, or ADOC-B) after signing.
How many signers can I add?
There is no technical limit in the add-in. The number of signers depends on your Agrello subscription plan.
Is my data secure?
All communication uses HTTPS and OAuth 2.0 encryption. Agrello is compliant with GDPR and eIDAS regulations.
Can I use the add-in offline?
No. An internet connection is required to authenticate and upload documents.
Can I edit a document after sending it?
No. Once sent to Agrello, the document is locked for signing. Save as a draft first if you need to make changes before sending.
How do I update my API credentials?
- Click the disconnect icon in the add-in status bar
- Enter your new Client ID and Client Secret
- Click Connect
Troubleshooting
If you encounter errors:
- Note the exact error message
- Enable debug mode: open your browser's developer console and run
localStorage.setItem('agrelloDebugMode', 'true'), then reload the add-in - A Debug button will appear next to the send button - use it to copy detailed logs
- Contact support@agrello.io with the error details and debug logs
Ready to get started?
Join Agrello and manage your contracts the smart way.