So, you want to automate sales contract signing in Pipedrive? Well, you’ve come to the right place.
With Agrello’s Pipedrive integration, using Zapier, you can connect your CRM to Agrello’s easy to use e-signing software.
Pipedrive is a Software as a Service (SaaS) Customer Relationship Management company. They create a variety of sales and marketing products for all sizes of business. Their sales software helps businesses with lead management, pipeline management, workflows and marketing automations, reporting and forecasting. Pipedrive is a number 1 rated CRM, and their users see an average of 28% more deals closed in the first year of use.
Zapier is no-code task automation tool that helps you connect over 6,000 tools together. It works by one app having a triggering event, and another app or set of apps automatically doing an action based on the triggering event. For example, getting new leads from Facebook, then automatically adding these leads to a mailing list.
Agrello is a contract creation, signing and management SaaS. We help you to create, sign, manage and automate your contract processes.
Here at Agrello we’re already quite familiar with Pipedrive, as we use it as our CRM. Since we’re using Pipedrive ourselves, we know how valuable it is for sales, customer support and marketing teams.
We’re passionate about helping all kinds of teams, including sales, to improve their processes. There are lots of contracts involved in sales. Sales agreements, order forms, service agreements, statements of work and renewal agreements- to name a few! Automating your sales contracts by connecting Agrello and Pipedrive can help you work quicker. That means you get your contracts to your prospects more quickly and you can close more deals.
There’s lots of tools you need to run a business and a sales process efficiently. In addition to your CRM, you also probably have marketing software like Hubspot, prospecting tools like Outreach or Apollo, and of course, your contract management system. It can feel like a lot of work flipping back and forth between them all.
Creating sales contracts comes with a lot of manual steps. Manually entering data into sales contracts or contract templates. Then emailing it to your sales manager, or your Chief Revenue Officer for review and approvals. Finally emailing the contract to the prospect, only to have a nail biting wait, constantly checking if they’ve reviewed or signed it. You came into sales to close deals, not deal with contracts!
With the Zapier, Pipedrive and Agrello, you can automate this manual and messy contract process.
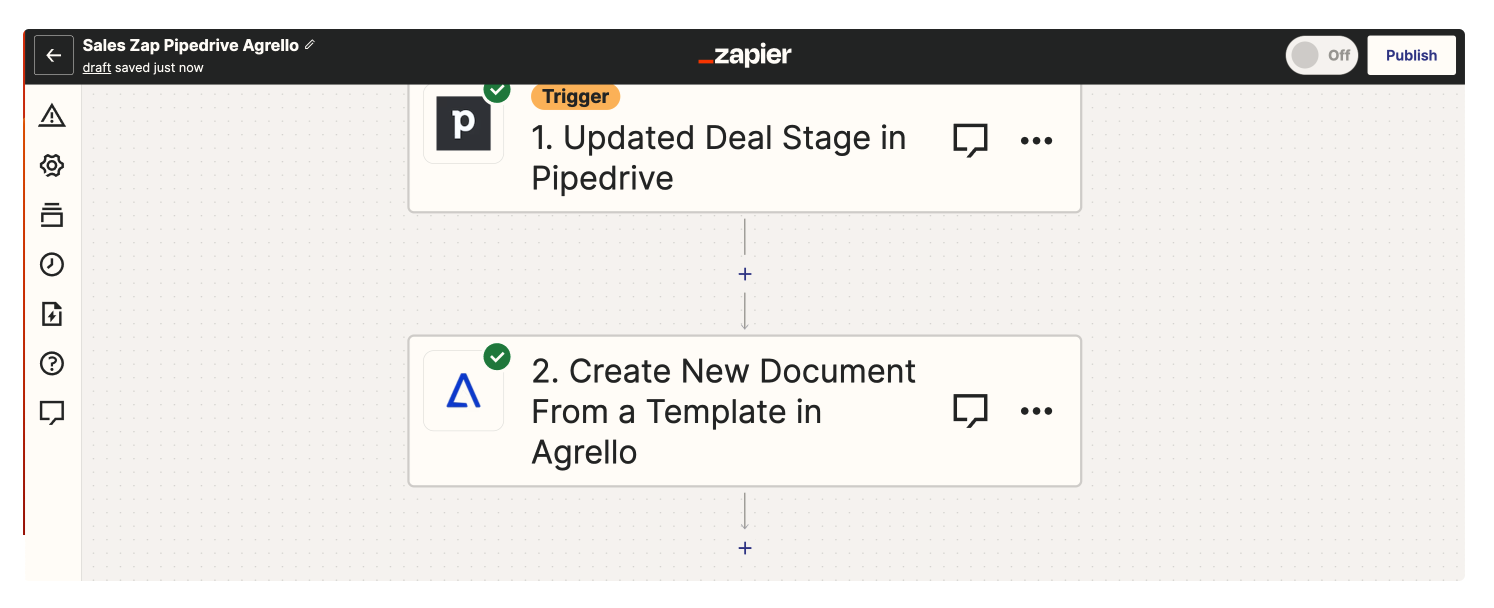
I will teach you how to create the following automated flow in Pipedrive and Agrello, using Zapier:
The basis of Pipedrive is the deal pipeline. This is where all of your deals live, and you can move them forward along each step of your sales process.
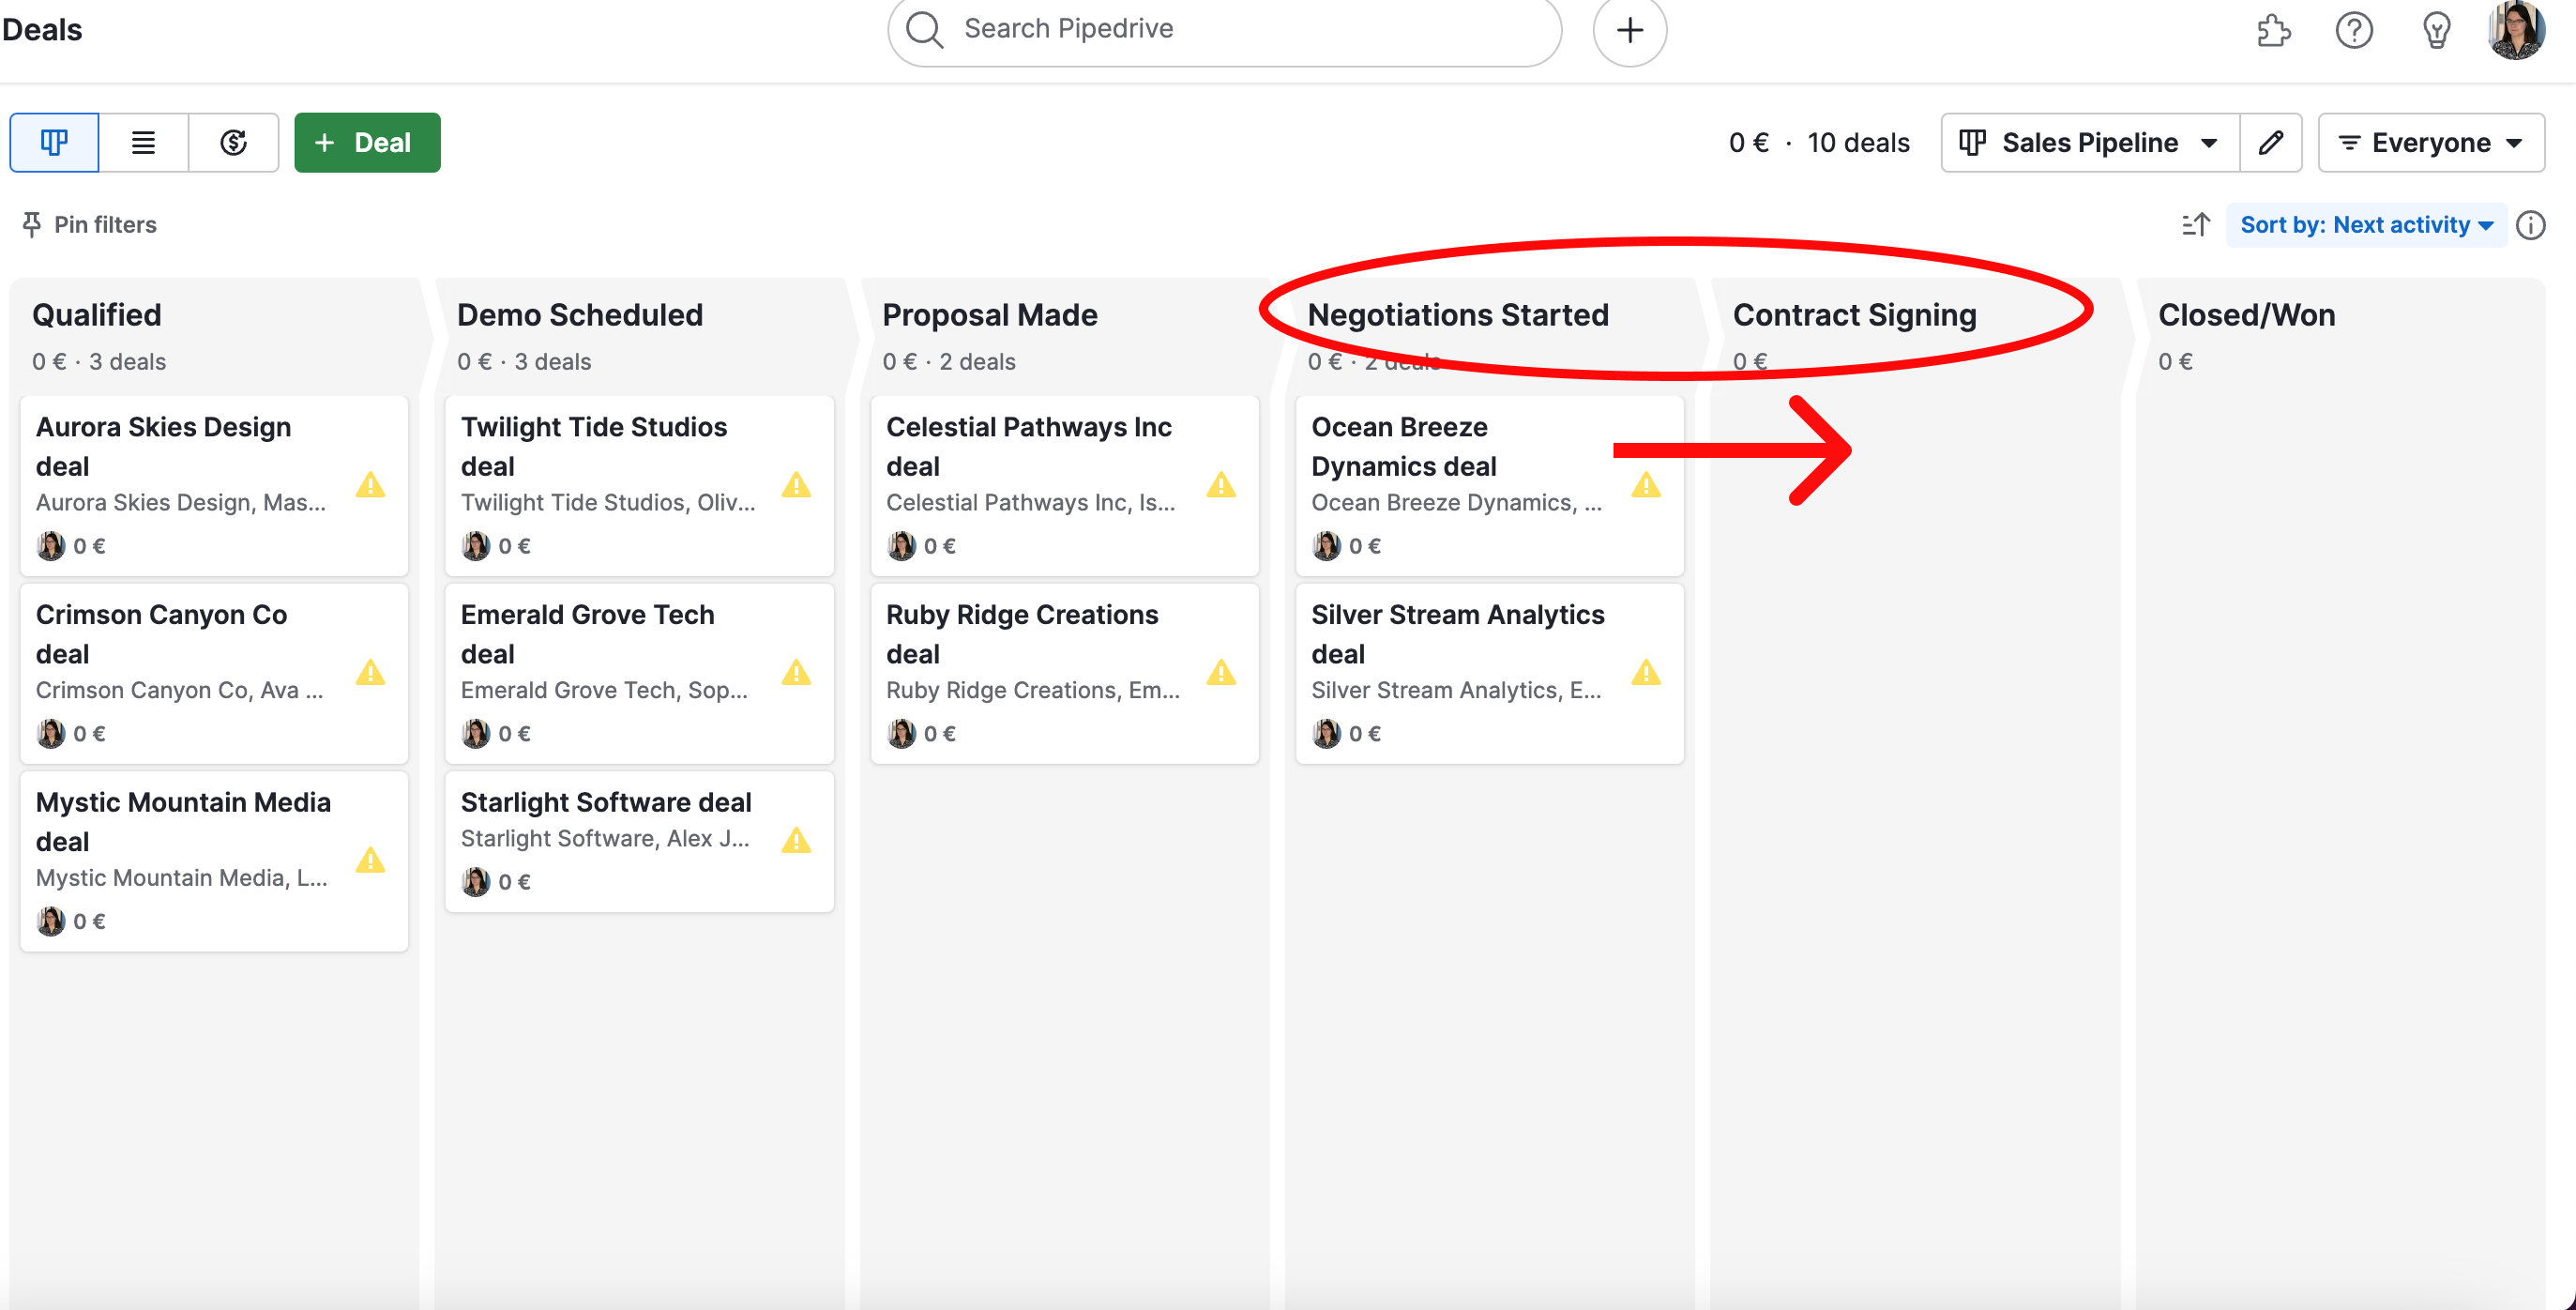
Here I have a deal pipeline set up in Pipedrive, populated by some deals.
I want to focus on the deals being moved from the “negotiations started” to “contract signing” stage of the pipeline. As I said above, this will be the trigger event for the automation to start.
Let’s look at one of my deals in more detail.
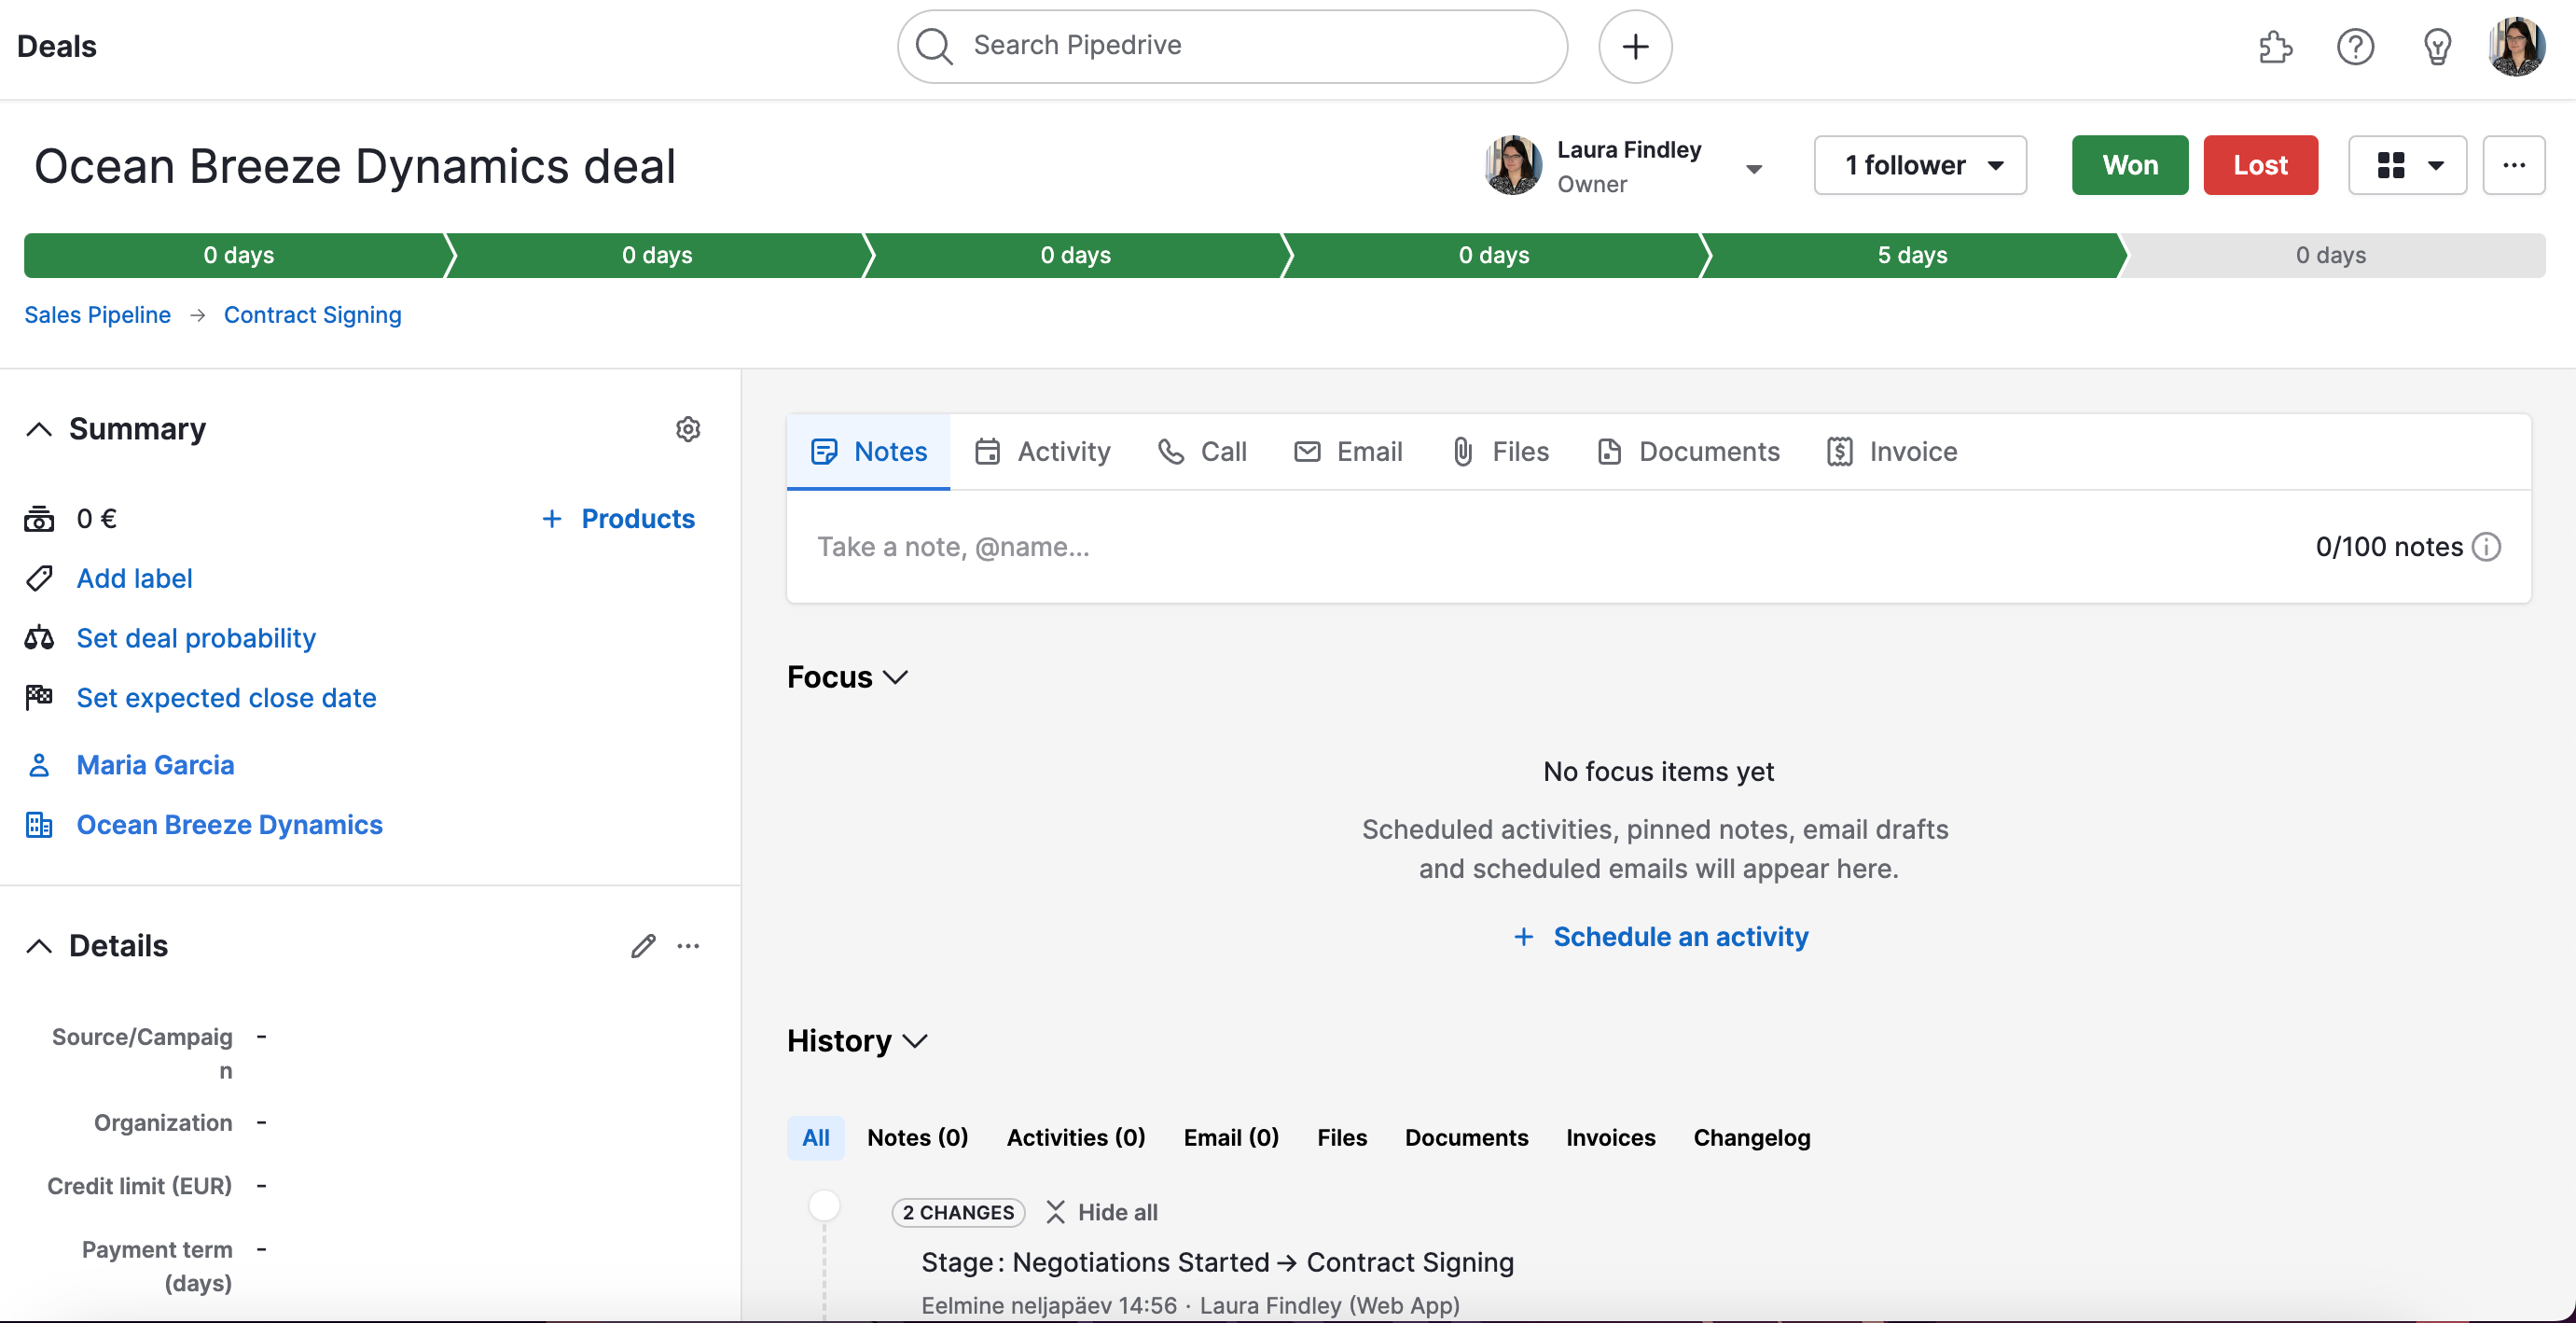
Here we can see the overall deal in more detail, and the stages it has passed through. In future if there are any notes, activities or emails we can see them here too.
On the left hand side we can see the summary and the details of the deal fields. And if we scroll down….
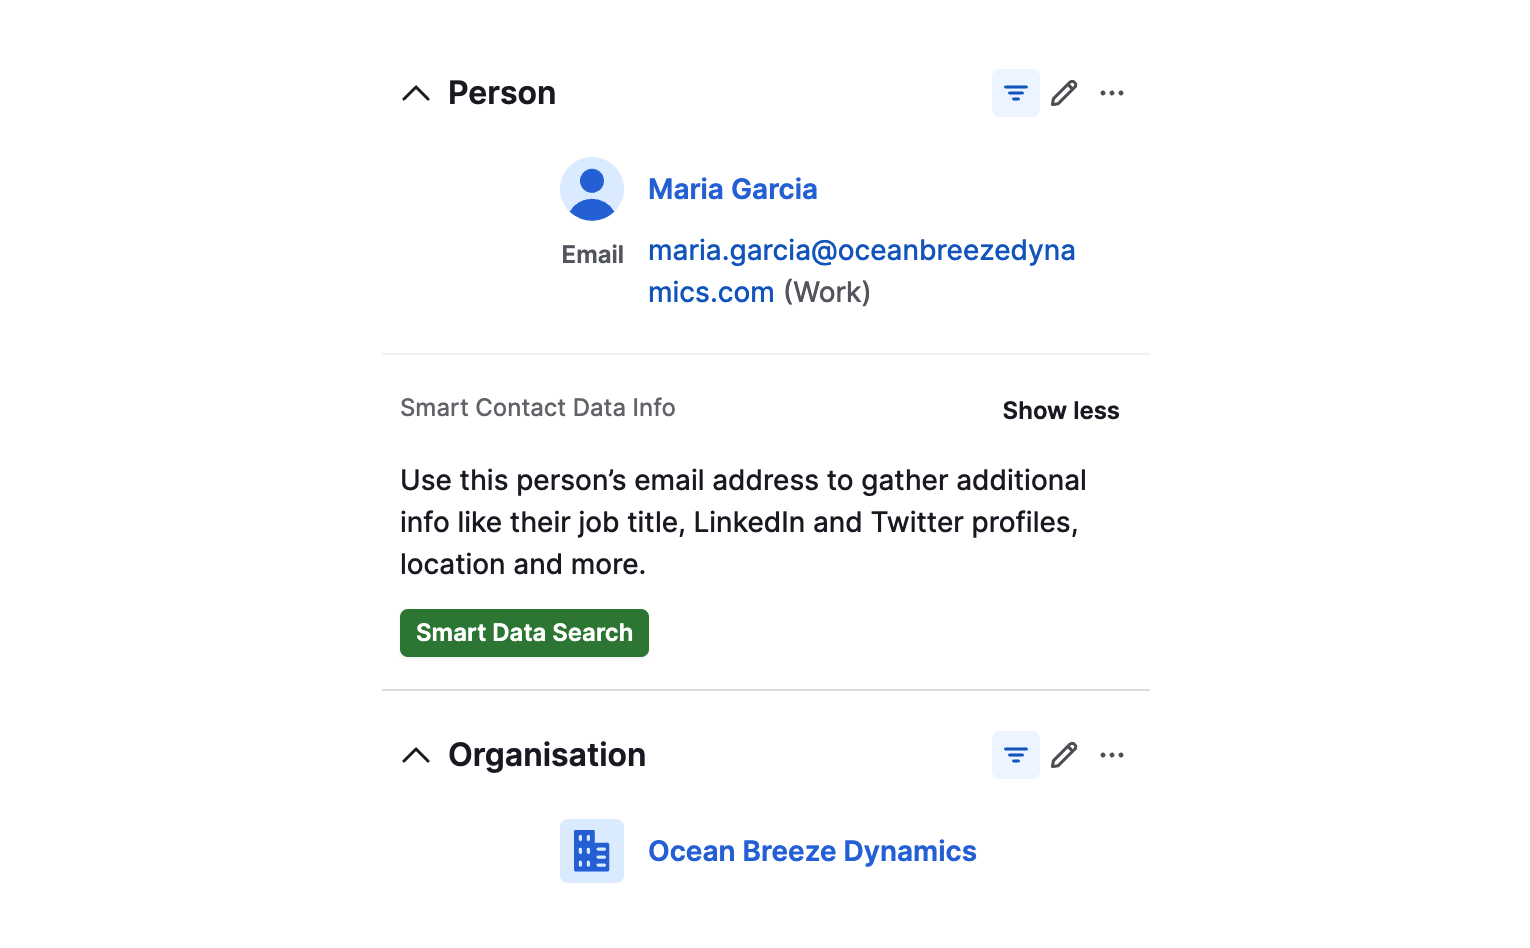
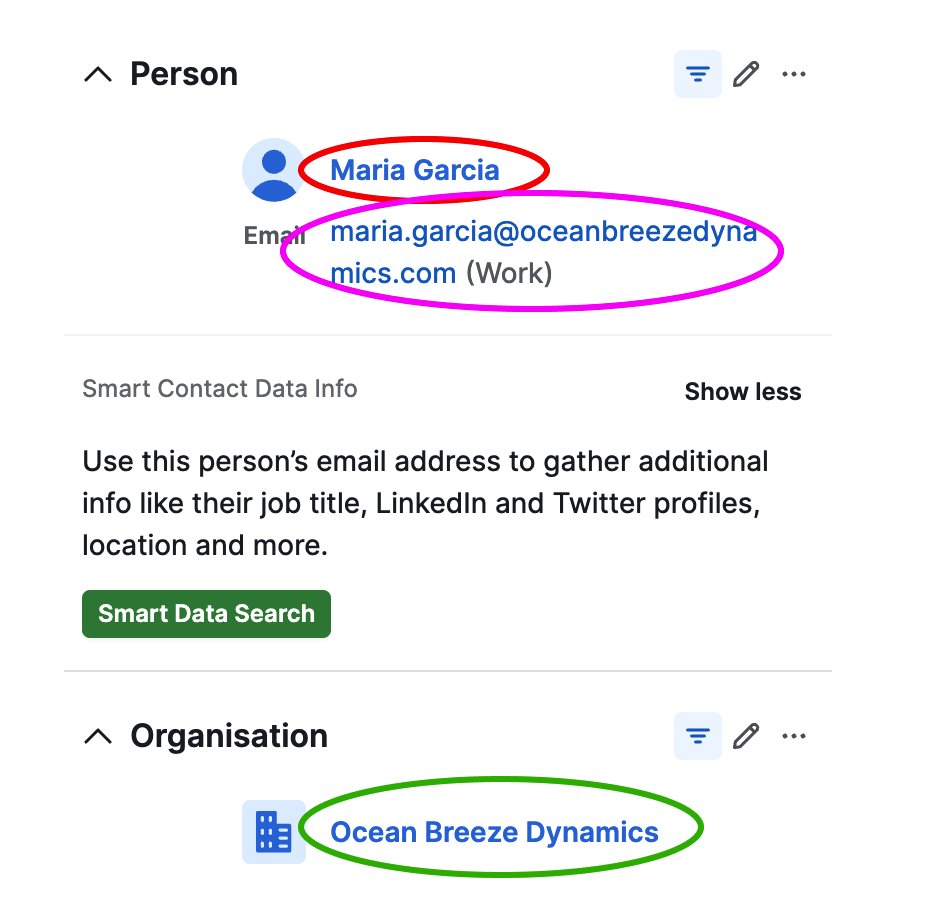
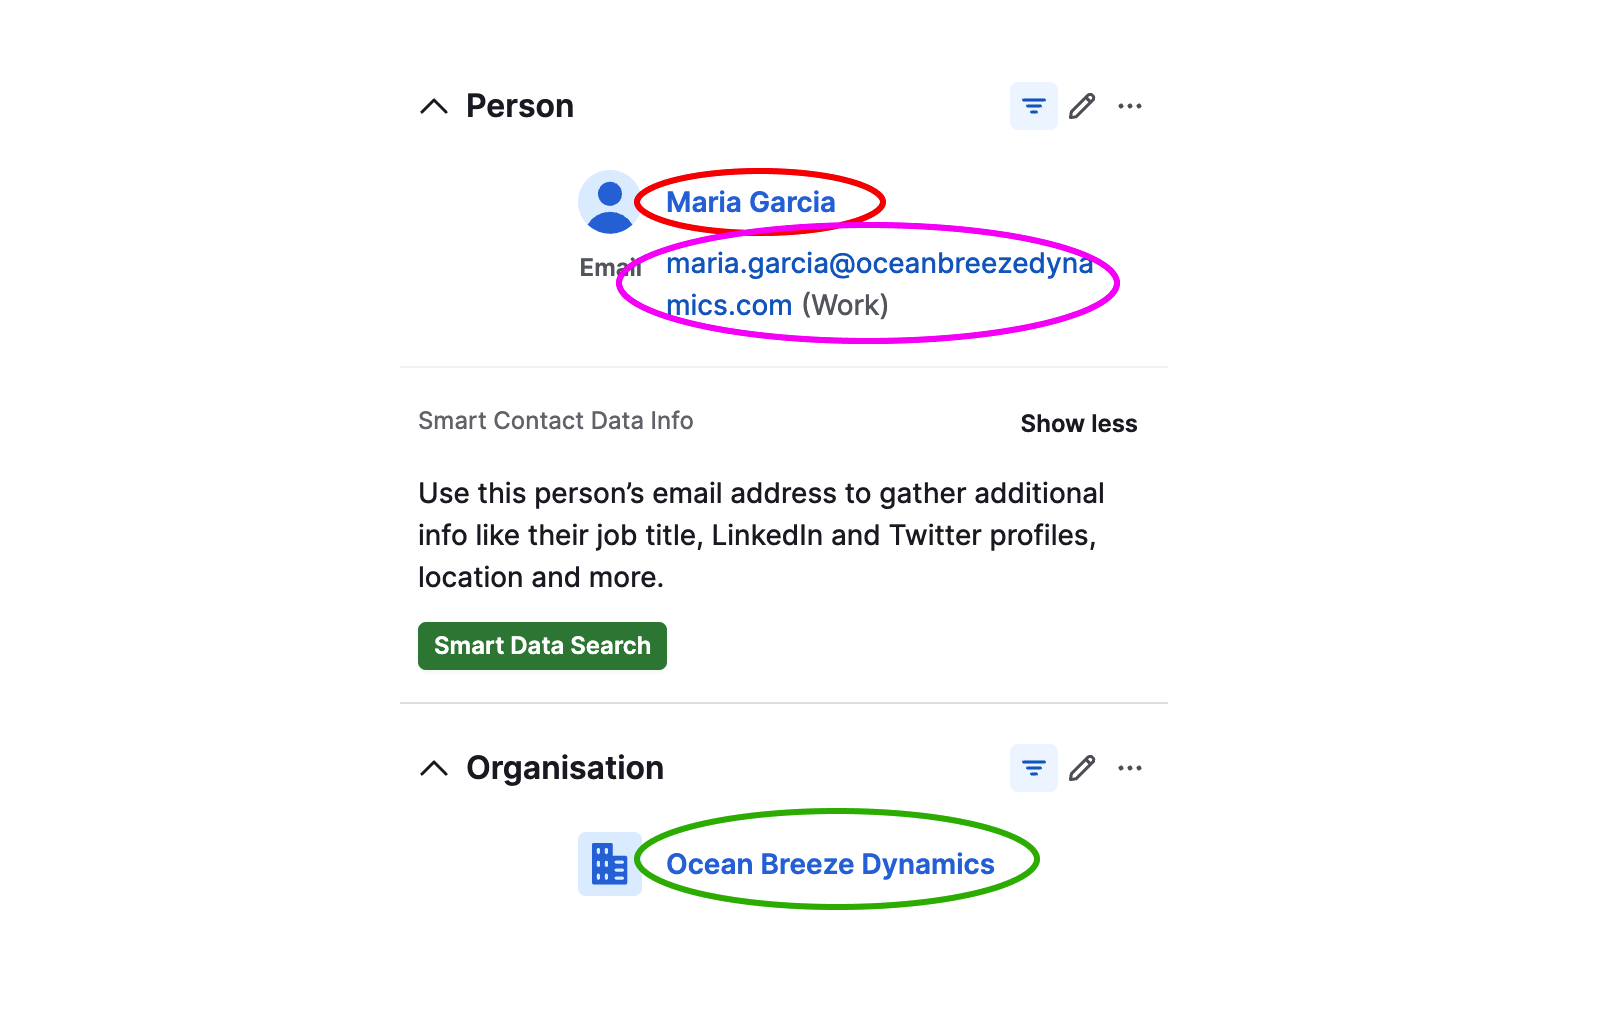
We can see the details of the person, and the organisation that’s linked to the deal. These deal details will form the basis of what will be filled into our contract template in the Agrello part of our automation.
So, talking of templates, now you want to set up your sales contract template in Agrello. As I said, this template will be used as the basis of the contract that will be automatically created through Zapier in Agrello.
To do this, log in to your Agrello account.
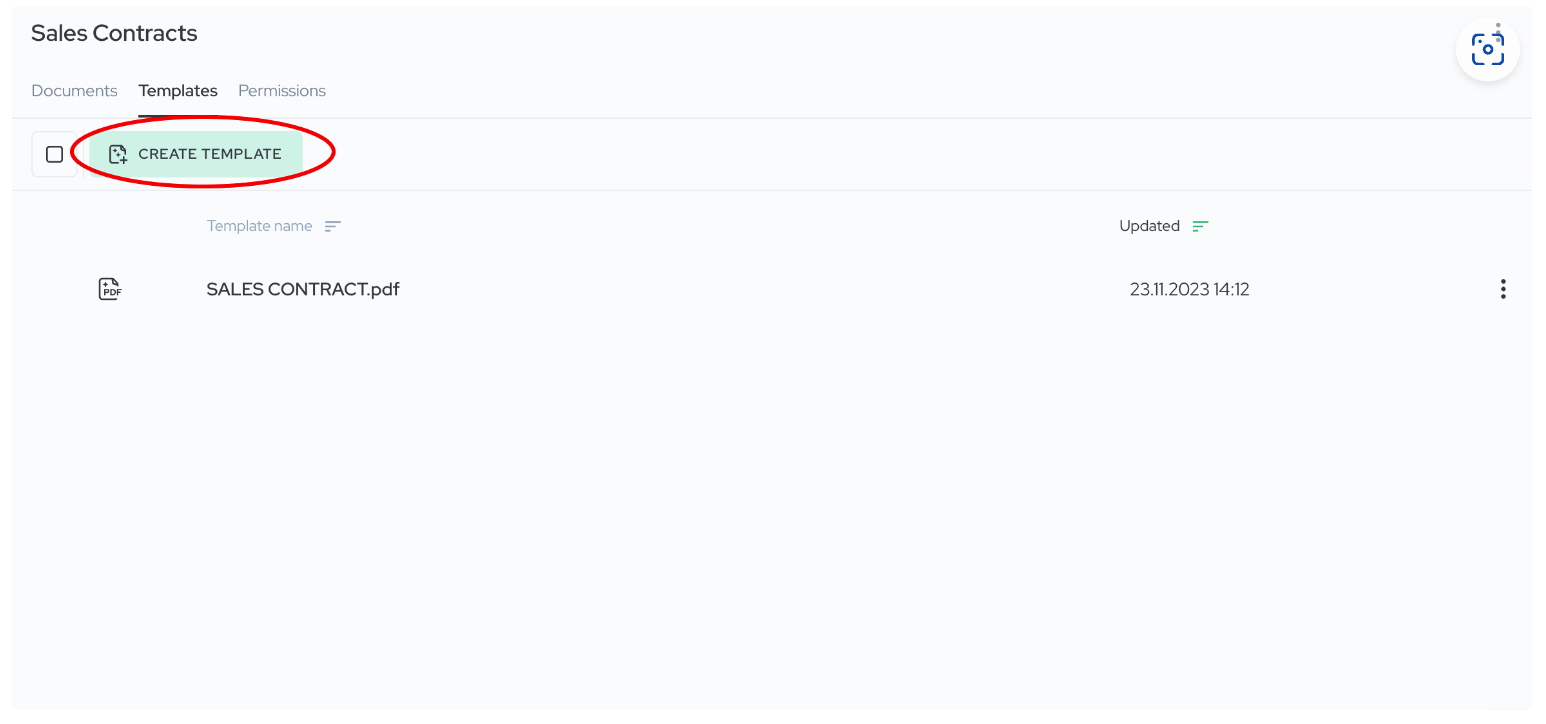
Then navigate to the folder that you want to create your contracts in. For me here it’s “sales contracts”.
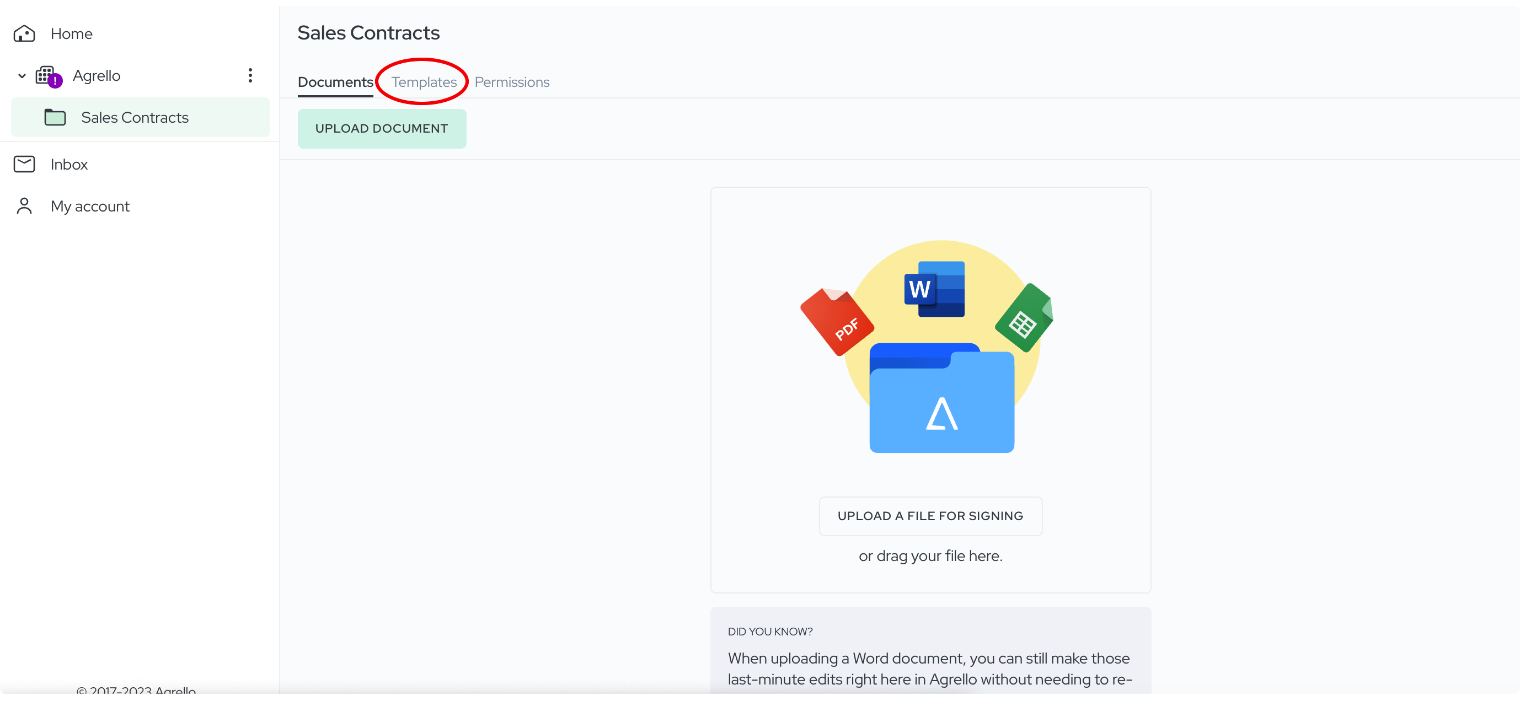
Then click on the “templates” tab up at the top there.
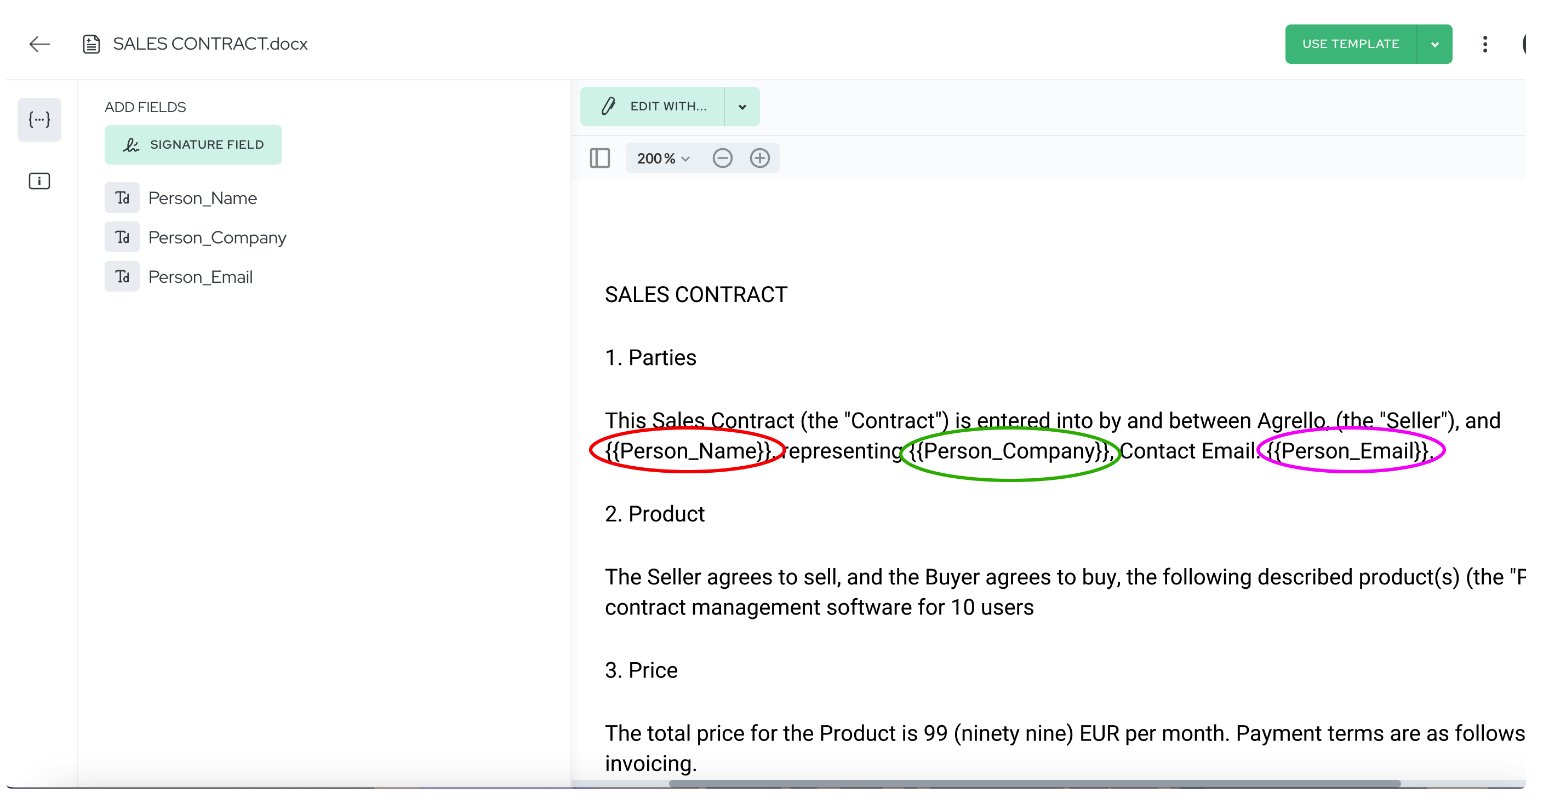
To create a template, you need to have a .DOCX or PDF file, with the fields you want to turn into fillable fields marked up with curly brackets. Here’s an example I made in Google Docs.

In Agrello, the curly brackets will turn into dynamic fillable fields when you actually create the document from the template.
Once you’ve set up your template, download it onto your computer.
In the templates tab, click “create template” and select the document in your computer that you want to make a template from.
Here we can see the fillable fields of the document in the {{curly_brackets}}. These fillable fields I’ve added correspond to our deal details in Pipedrive.
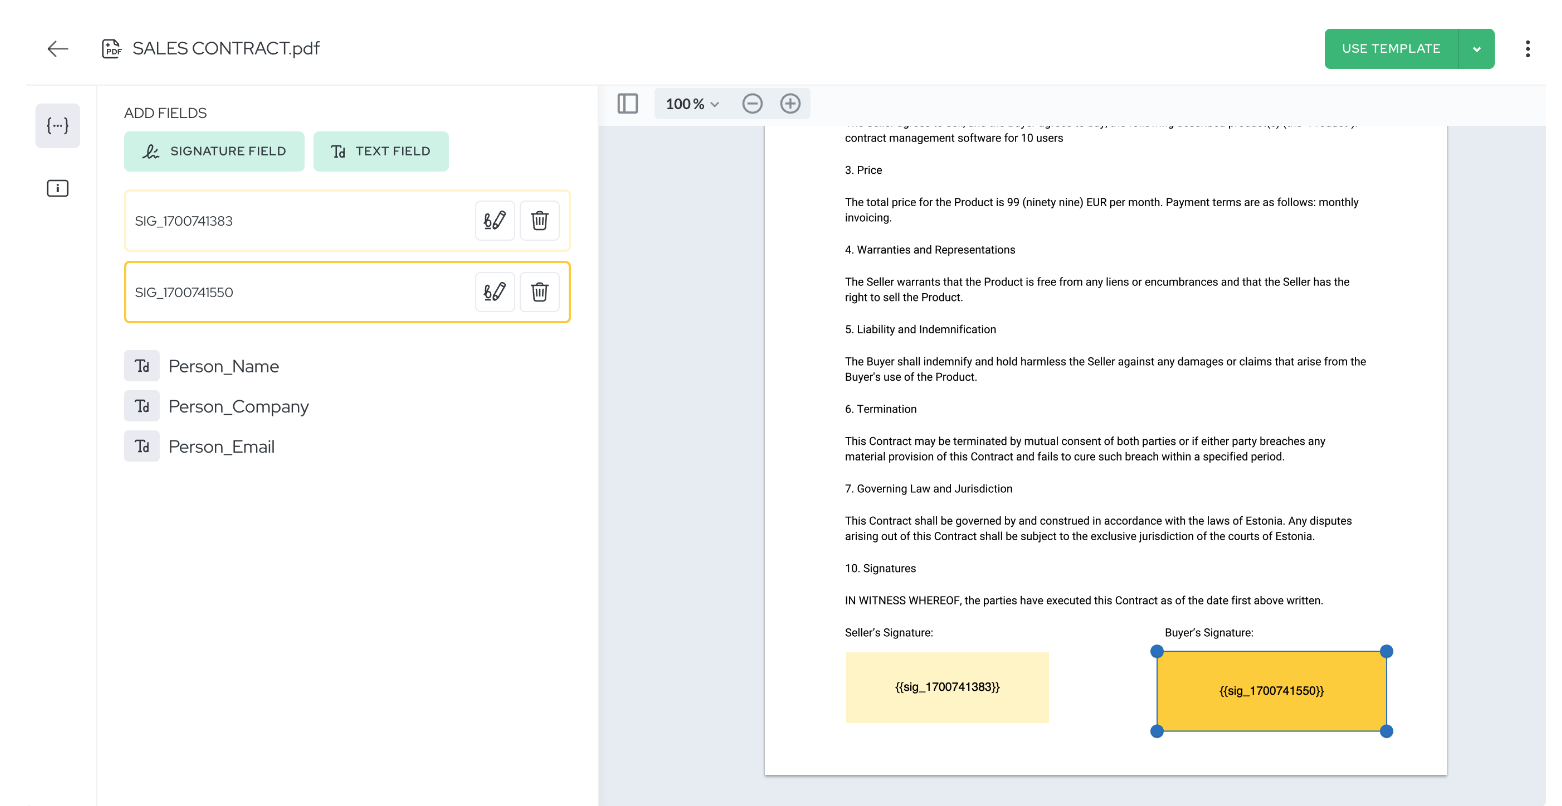
Now we need to add the signature fields into the template.
Scrolling down to the bottom of the document we can see the place to add signature fields.
Now all there is to do is click the green button labelled “signature field”.
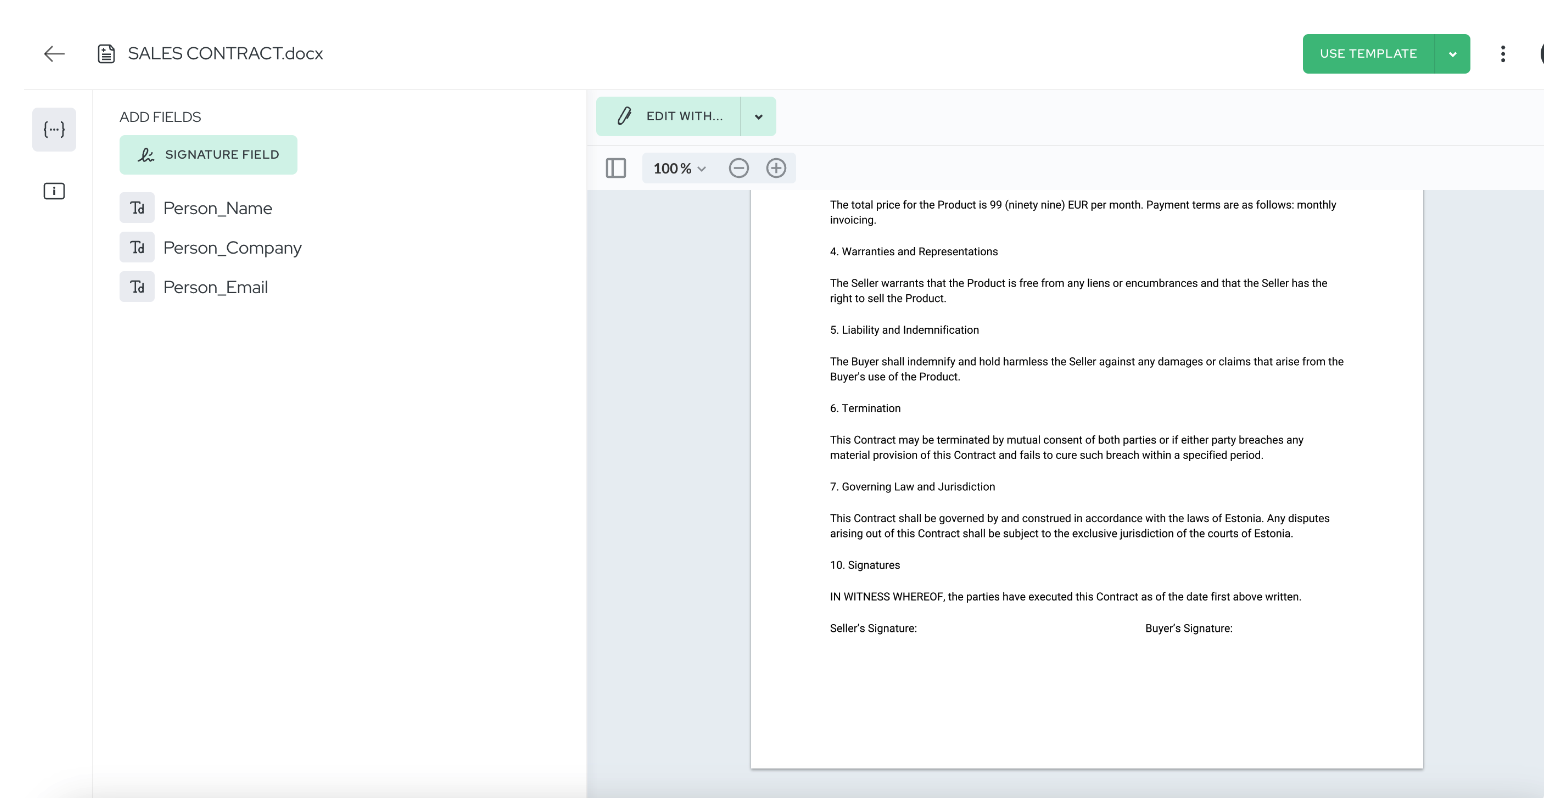
We can then draw out the signature fields onto our template.
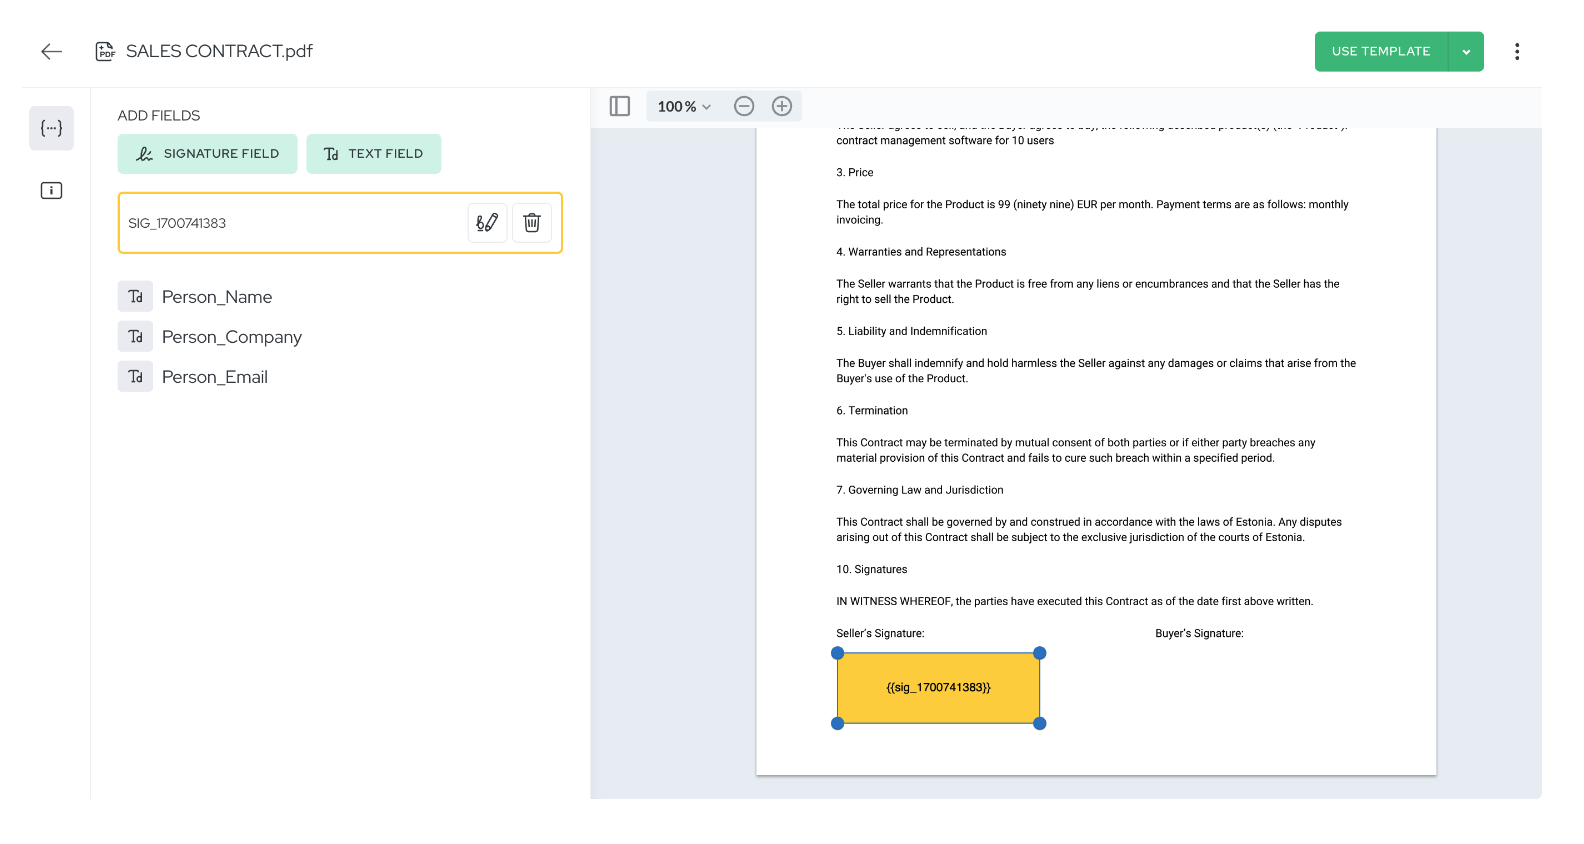
There are two signature places in the document, so I’ve added two.
Once I’ve finished drawing the first one, I can simply click the “signature field” button again to create and click and drag a second one.
We’re all prepped to jump into Zapier. We’ve got our Pipedrive pipeline prepped, as well as our sales contract prepped in Agrello. Let’s use some automation magic to connect the two!
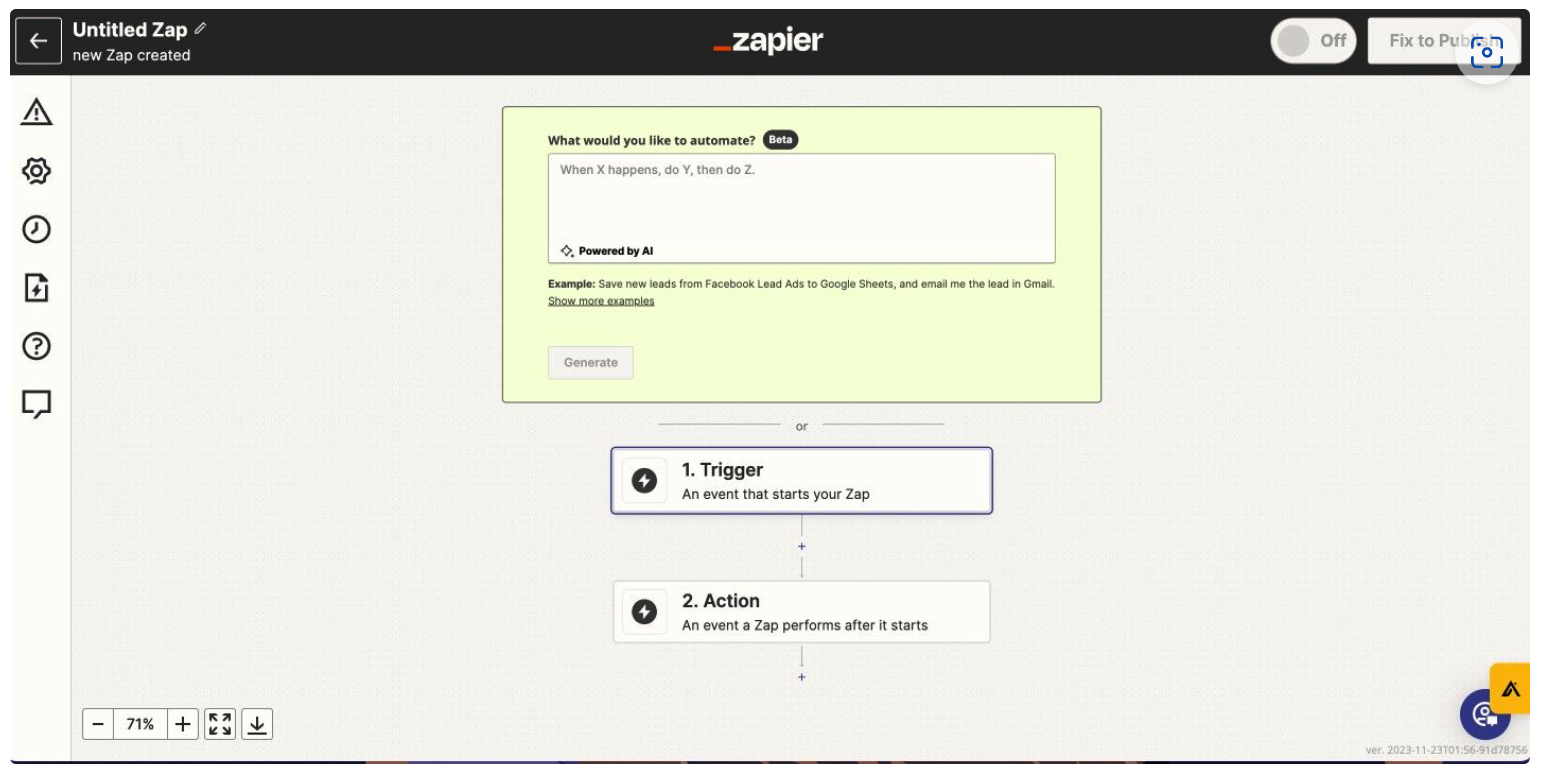
This is what Zapier looks like when you first jump in. To create a new Zap we can click the +create button or the button under where it says “there are no Zaps in this folder”
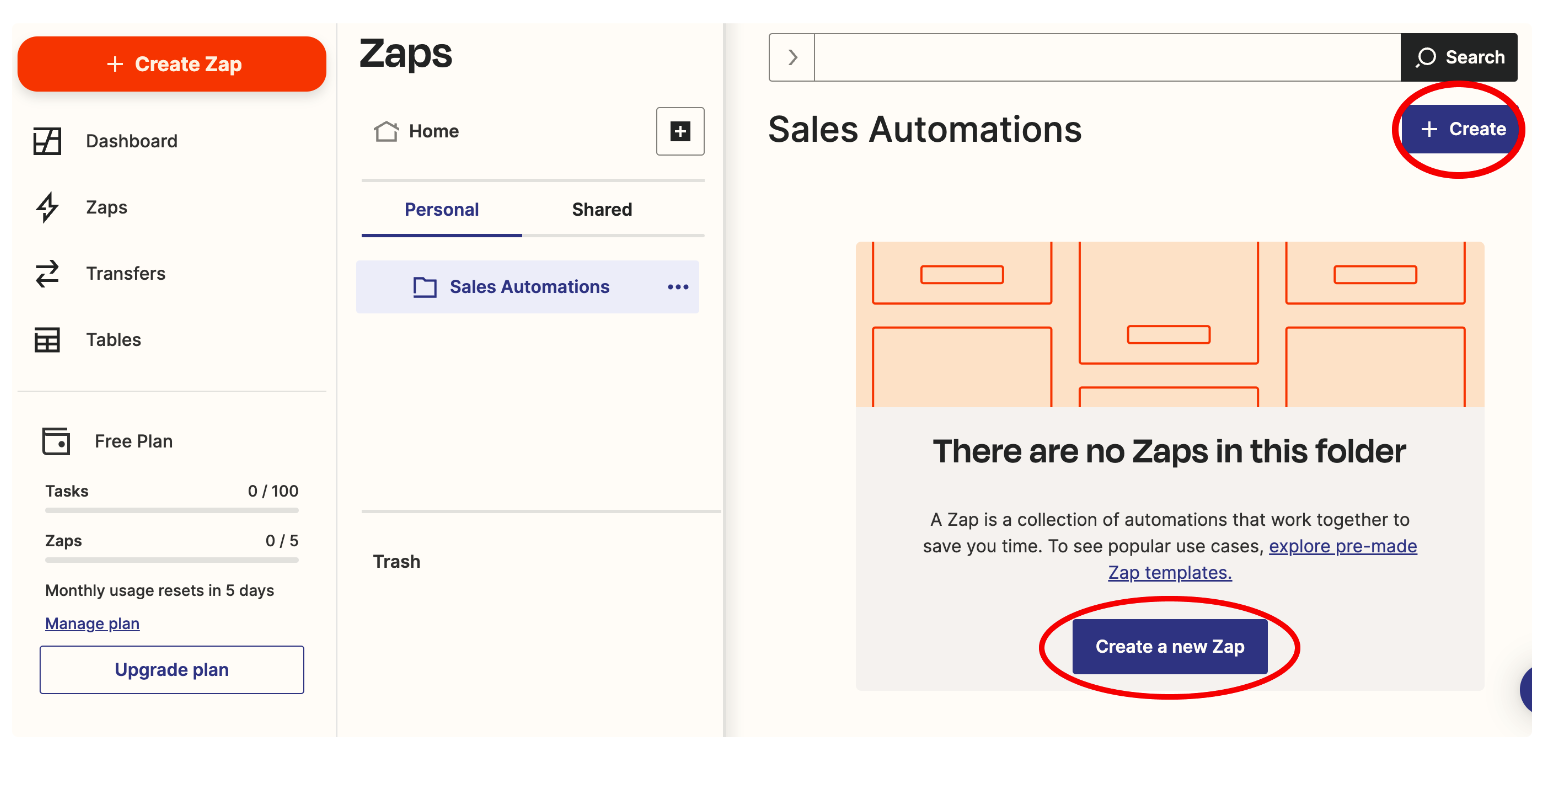
If we do that, we’re brought to the Zap creation screen.
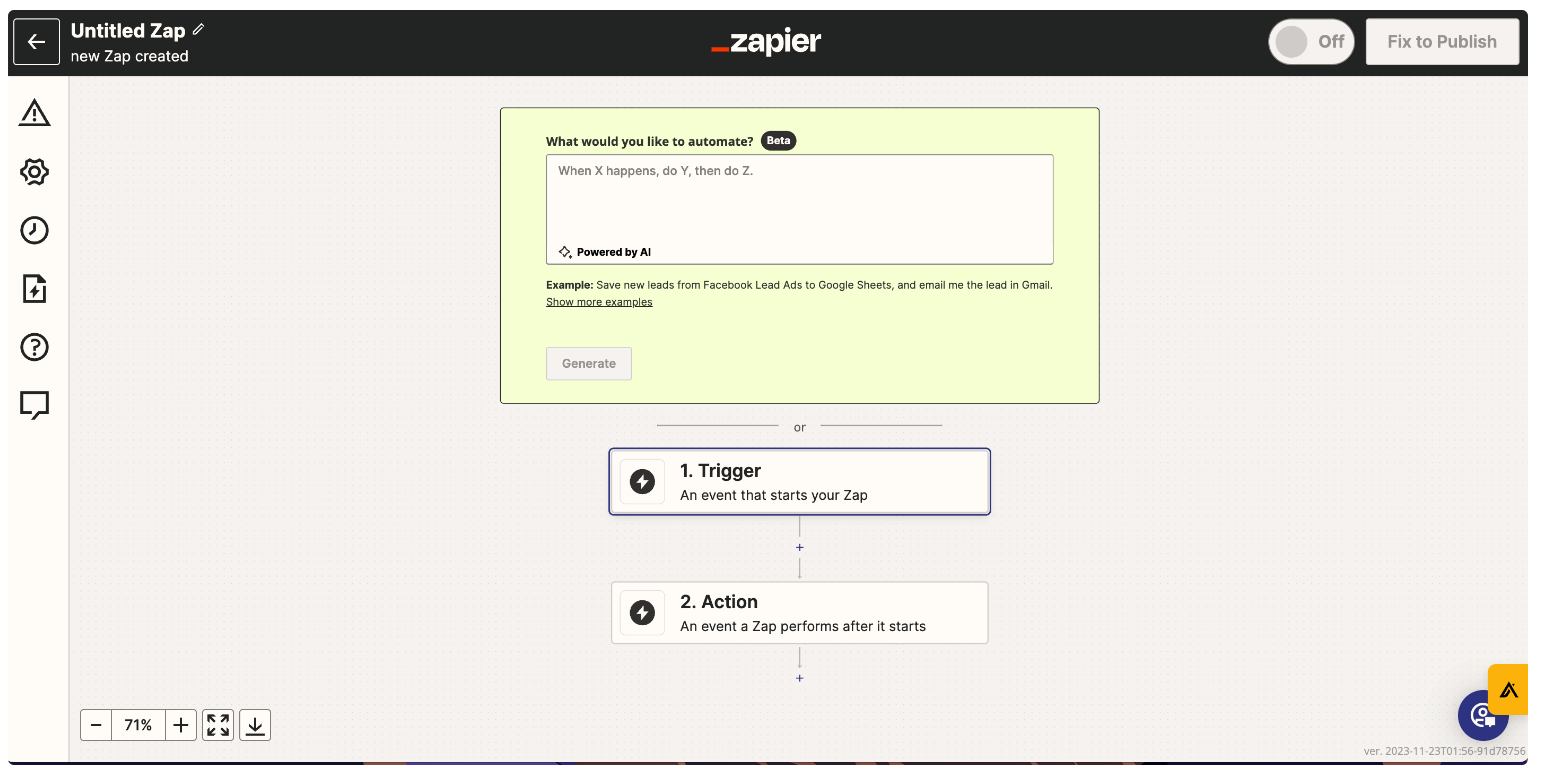
Let’s get started by configuring the trigger event.
Clicking the “1. Trigger” button will bring up a search screen like this:
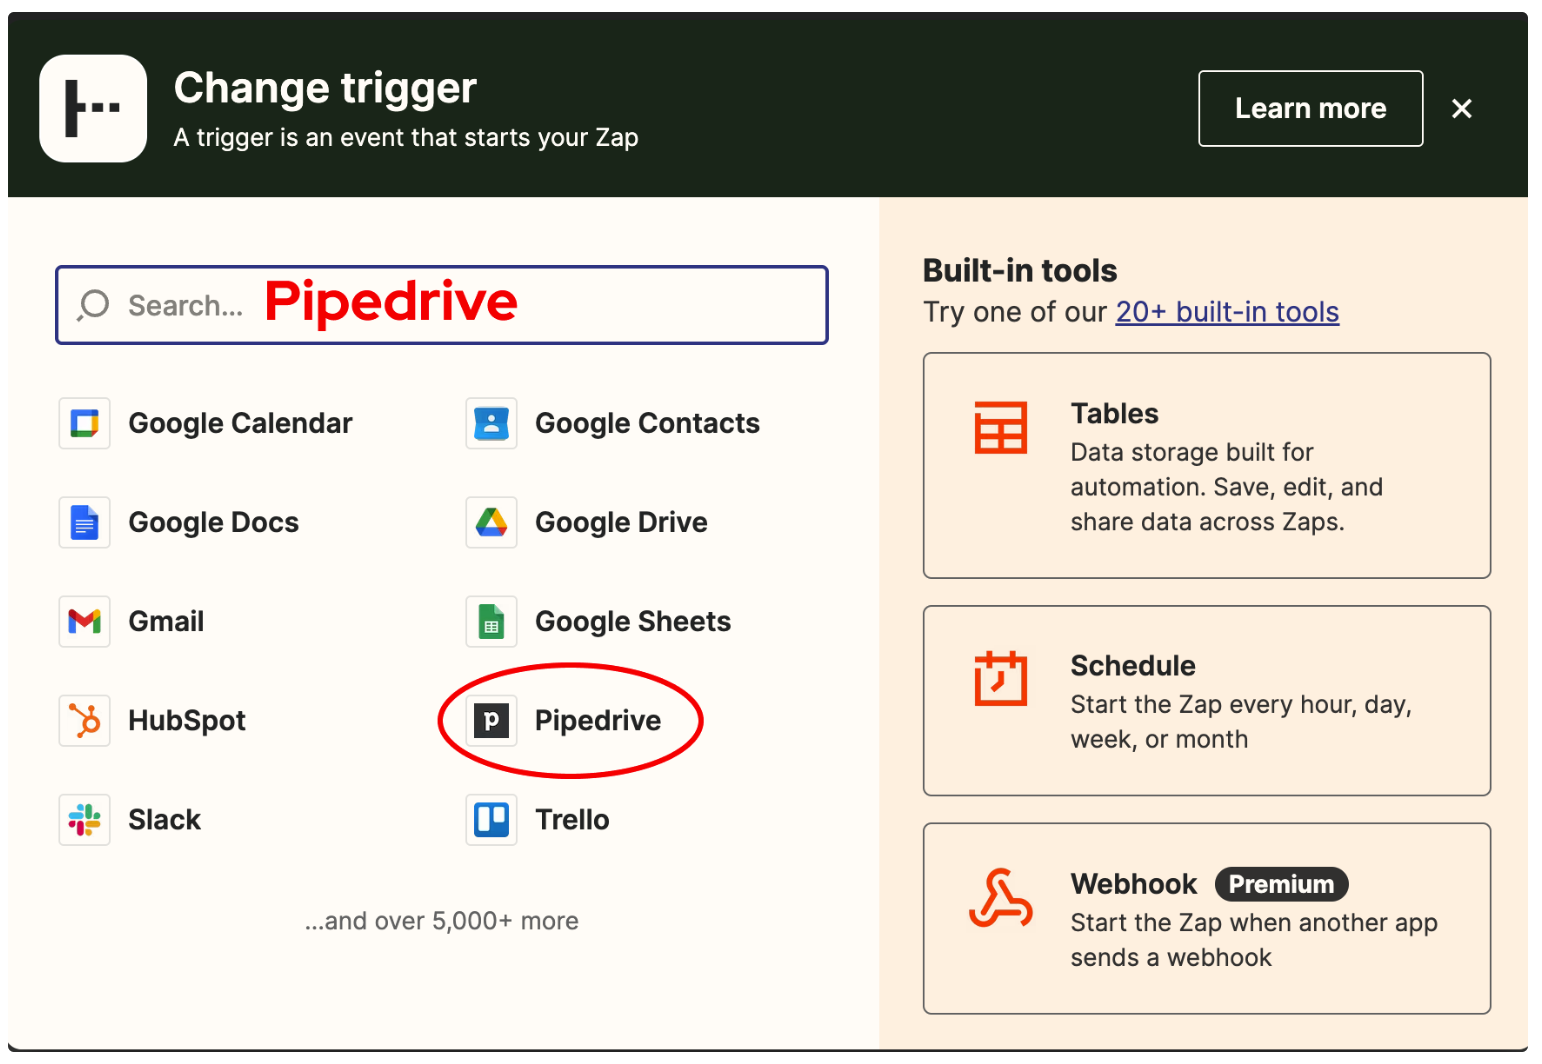
Here we can either search for Pipedrive, or it handily pops up here for me so I can select it straight away.
Now we can choose the triggering event in Pipedrive.
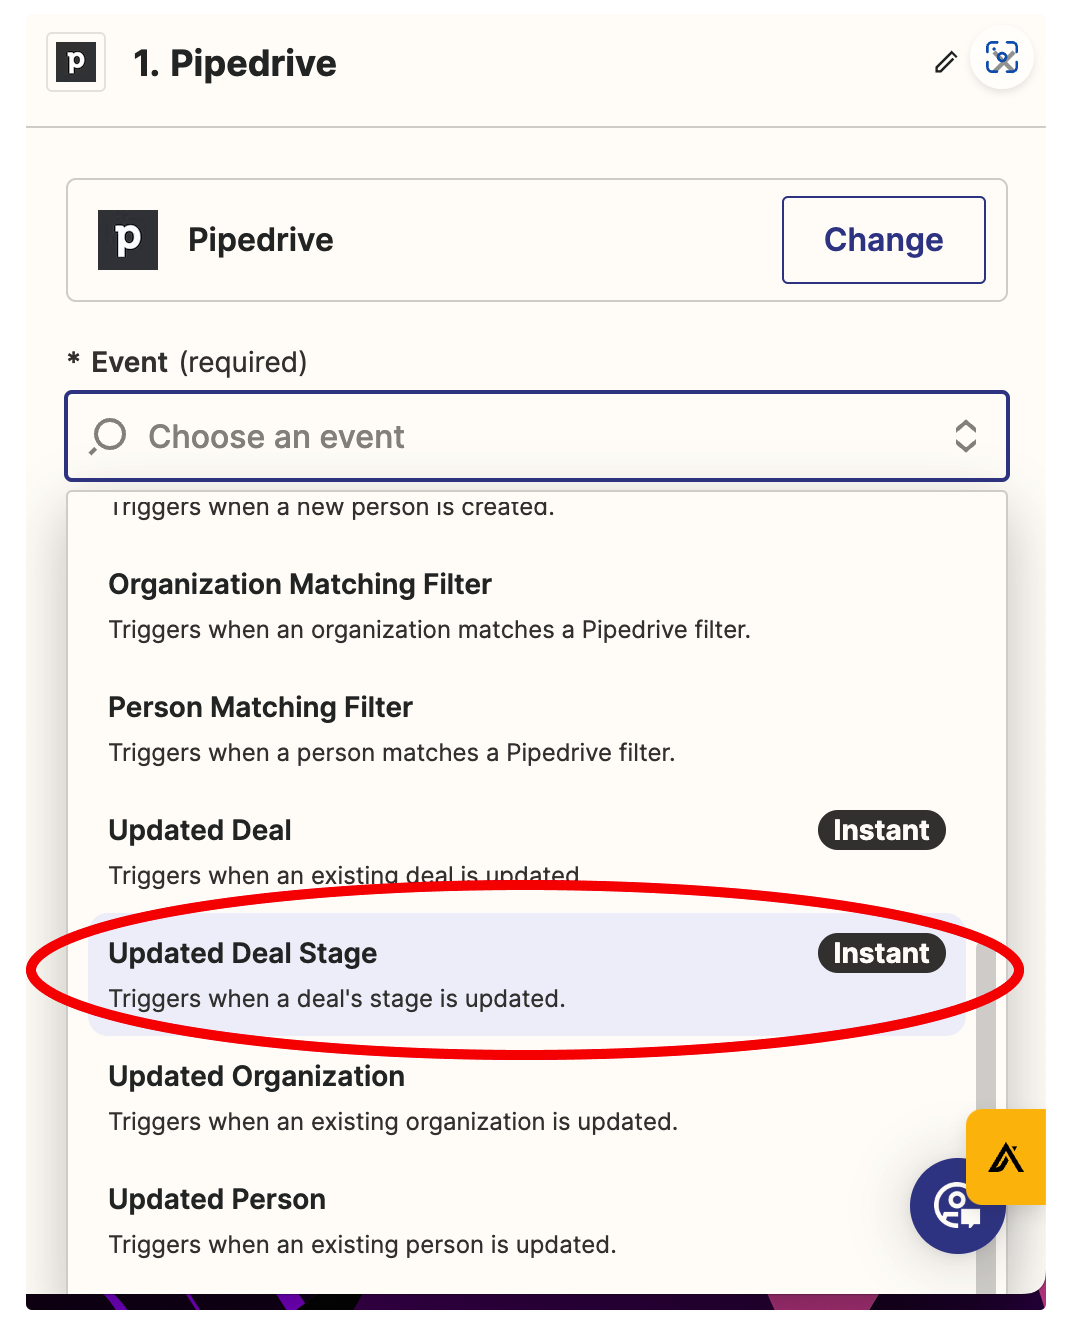
As explained above, this will be “Updated Deal Stage”.
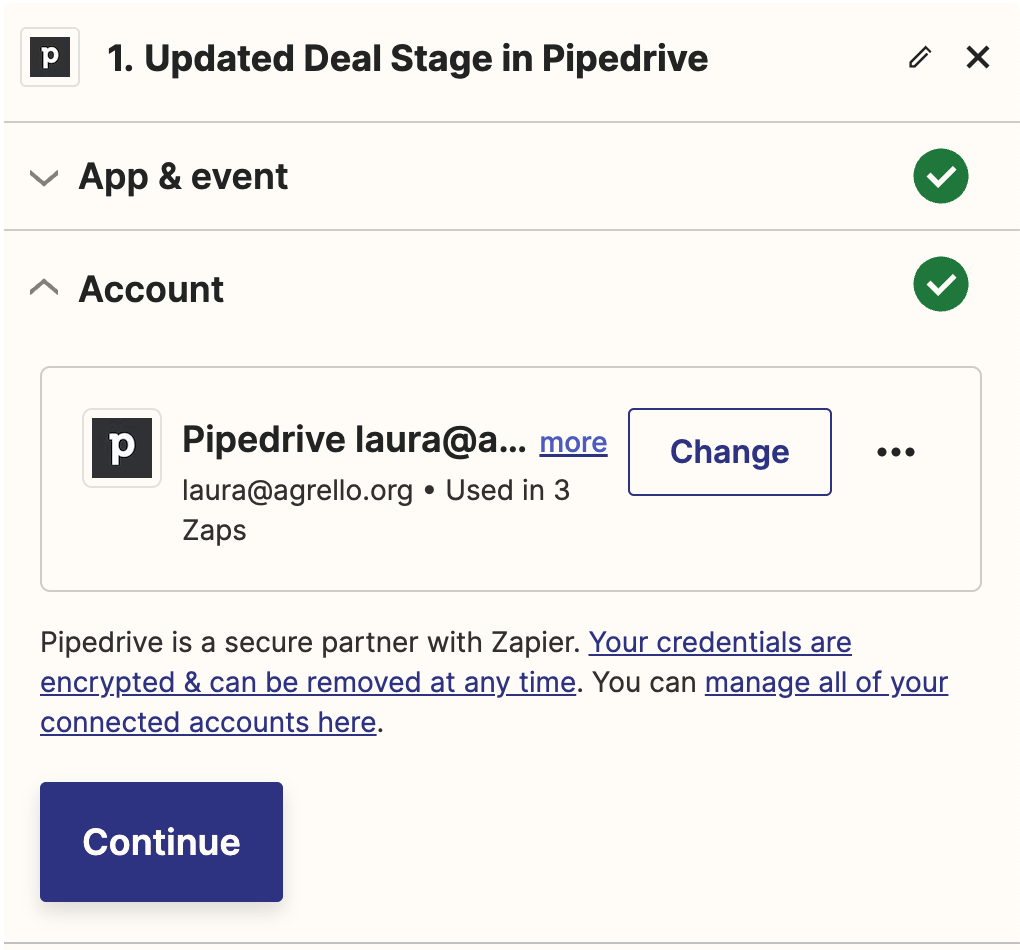
Now you have to link your Pipedrive and Zapier accounts.
I’ve already done this, but if you haven’t before then you will need to authenticate your Pipedrive account and give Zapier some access permissions for your Pipedrive account.
We then need to set the specifics of our trigger.
For this one, it is choosing the stage in the pipeline where the deal will be moved into.
In our case, as I explained above, we want this to be the “contract signing” stage.
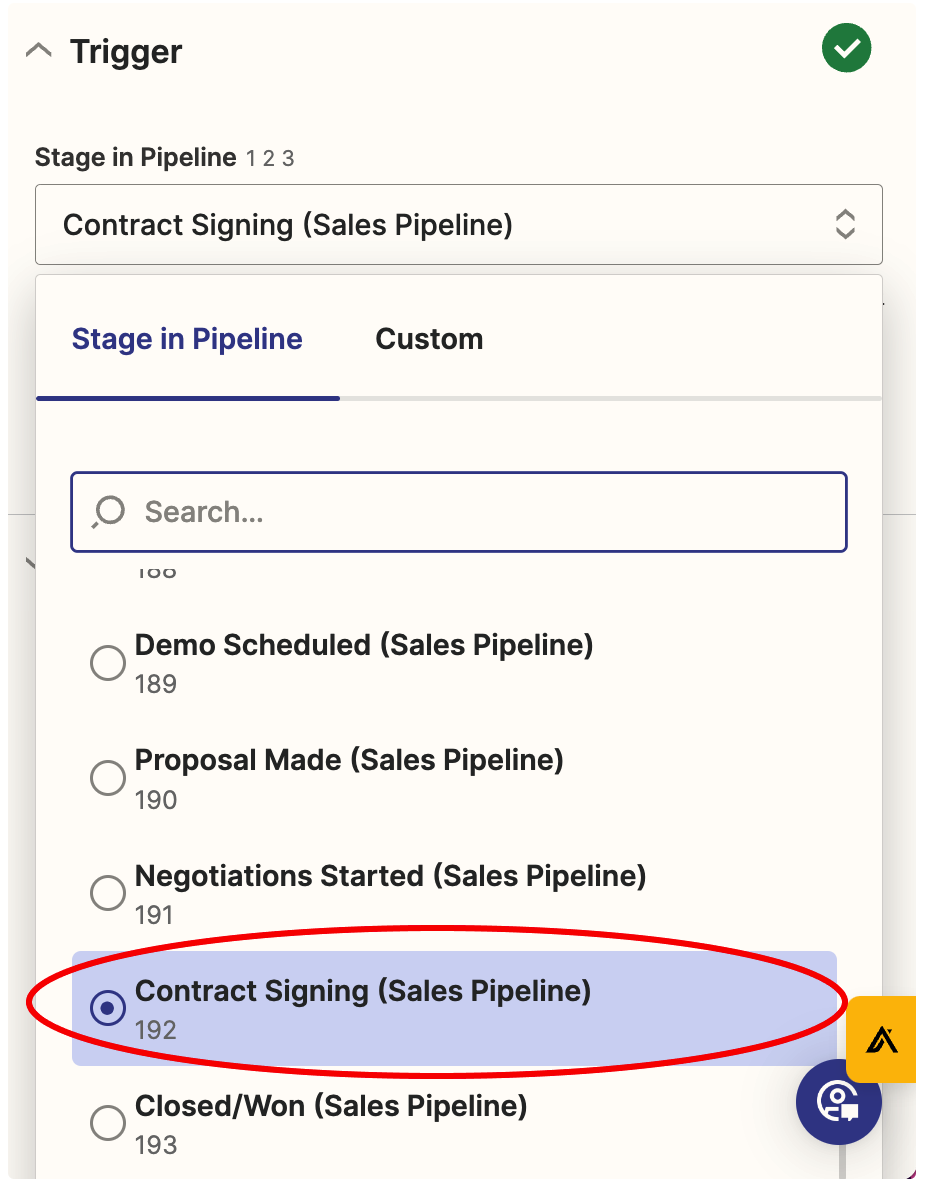
You can scroll down and select the stage of the pipeline and the pipeline in the dropdown menu.
Now we need to test the trigger to make sure it works.
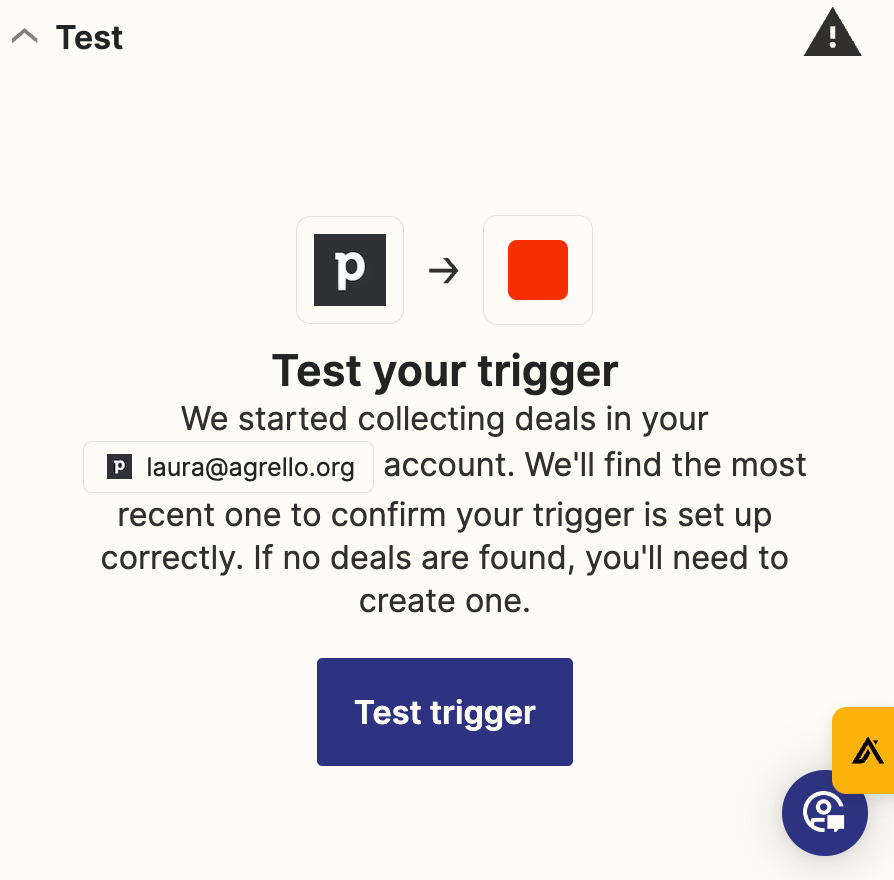
Click “test trigger” to start the test.
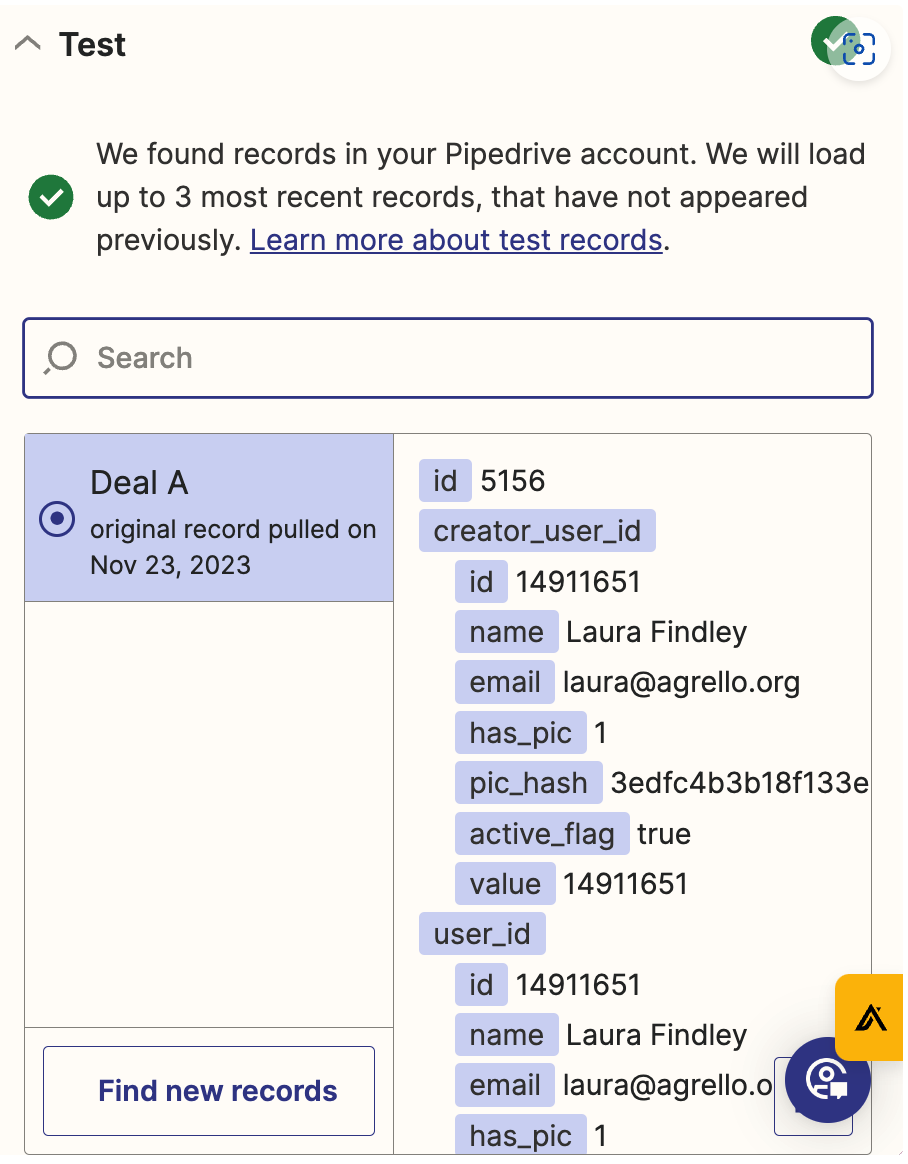
Zapier pulls records from your Pipedrive account to test the trigger is working. In this case, it worked!
We’ve now set up our Pipedrive triggering event, we can move onto the Action in Agrello.
To do this, click on the “2. Action” button underneath the trigger button.
Now we have to search up Agrello, just like we did with Pipedrive.
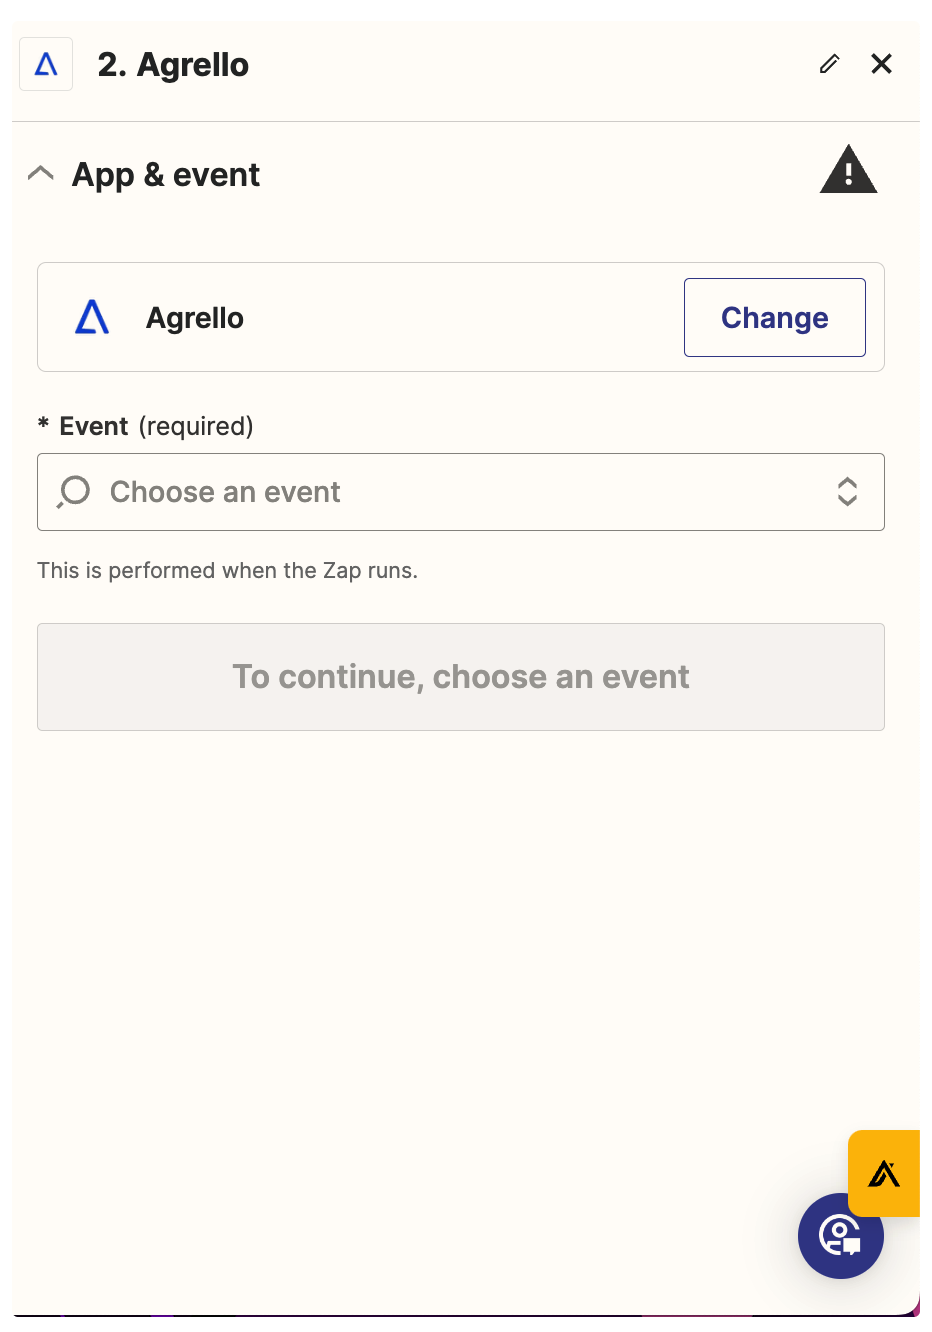
Once we’ve found Agrello and clicked into it we can select the event from the dropdown menu.
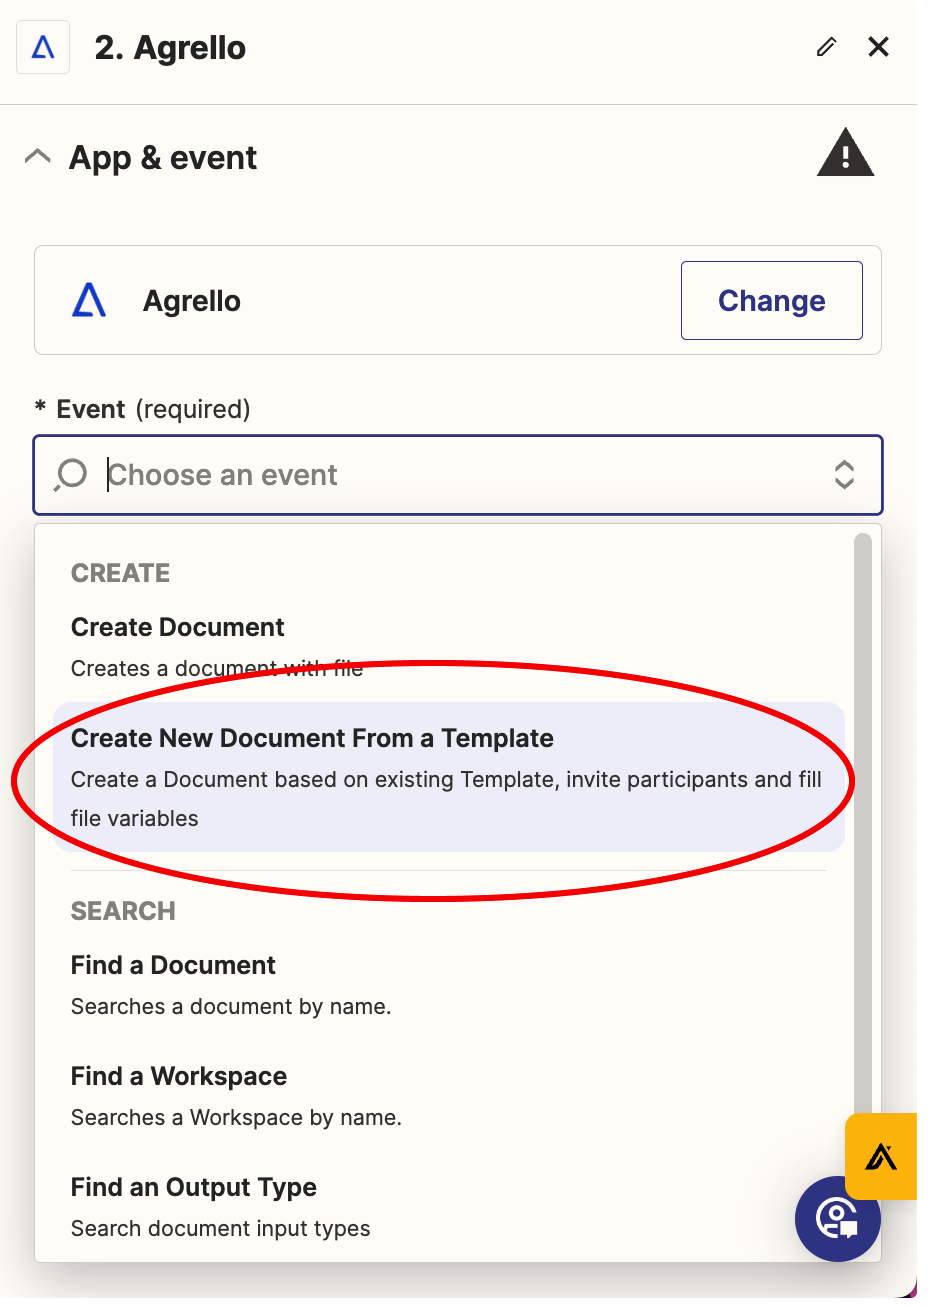
Here we want to select “create new document from template”.
This will mean we can use the lovely template we created earlier for the basis of our automatically created sales contracts.
Now we need to configure our account in Agrello.
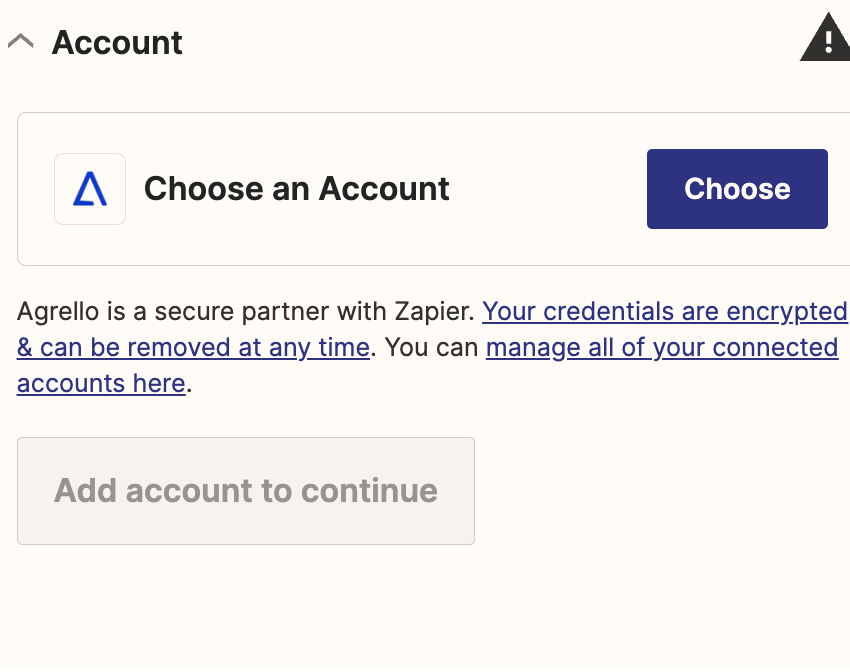
If you click “choose” you should be able to select your account, and authenticate with the Agrello verification code you should get in your email.
It’s time to set up the action on the Agrello side of things. This has a few steps, so follow along carefully.
First, we have to select the workspace the template and folder is contained in. Select this from the first dropdown menu.
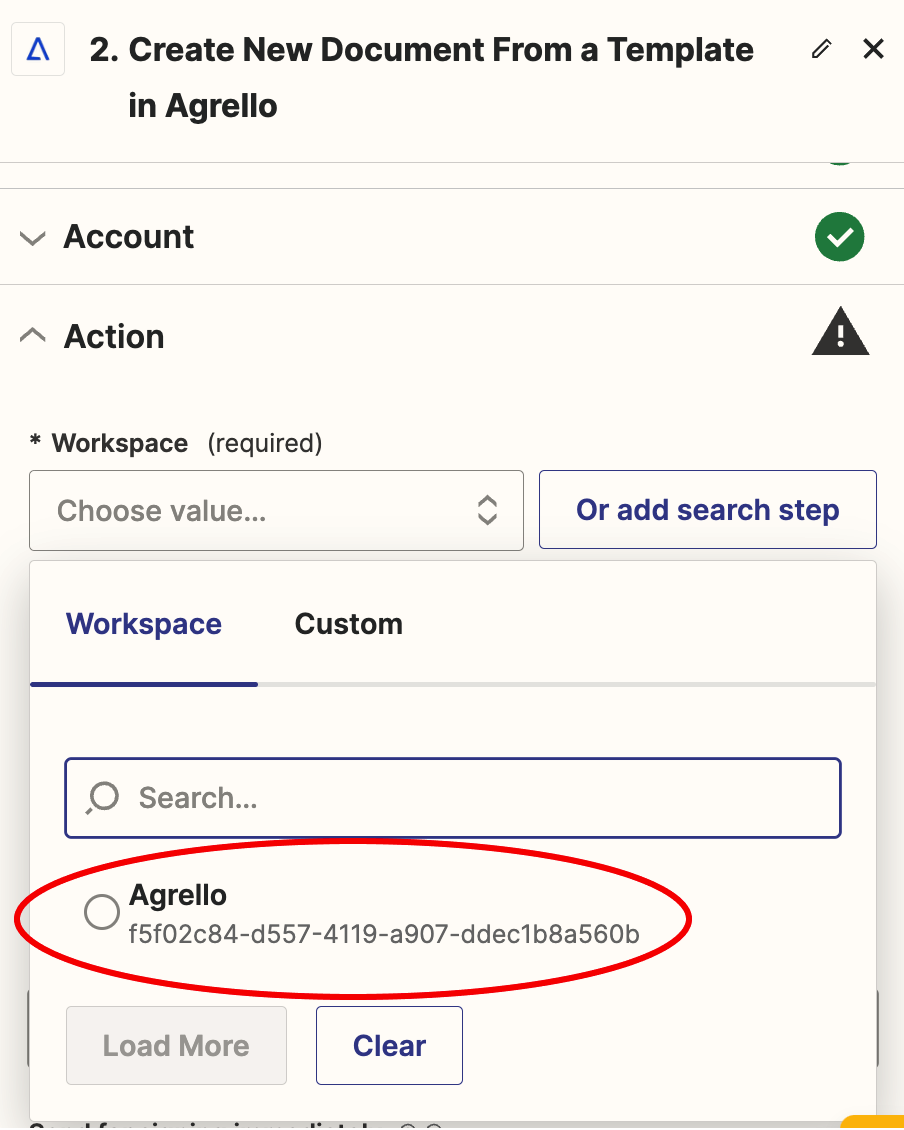
You should have one workspace labelled with the company name you inputted at signup.
Next, we have to select the folder where the template lives.
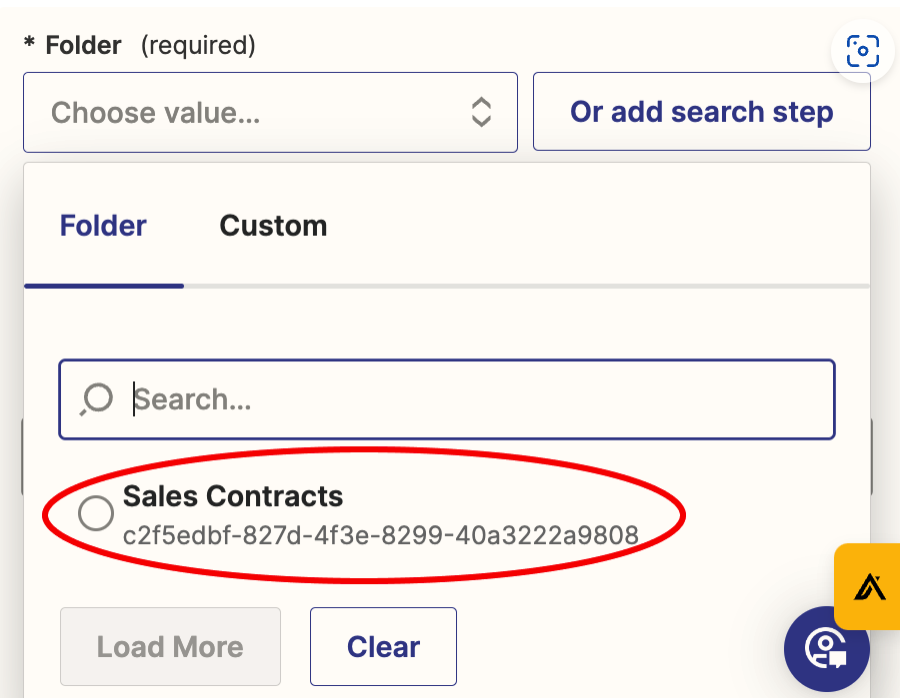
Here I only have one, but make sure to select whichever folder the template you want to use in.
Then we will select the template from the next dropdown.
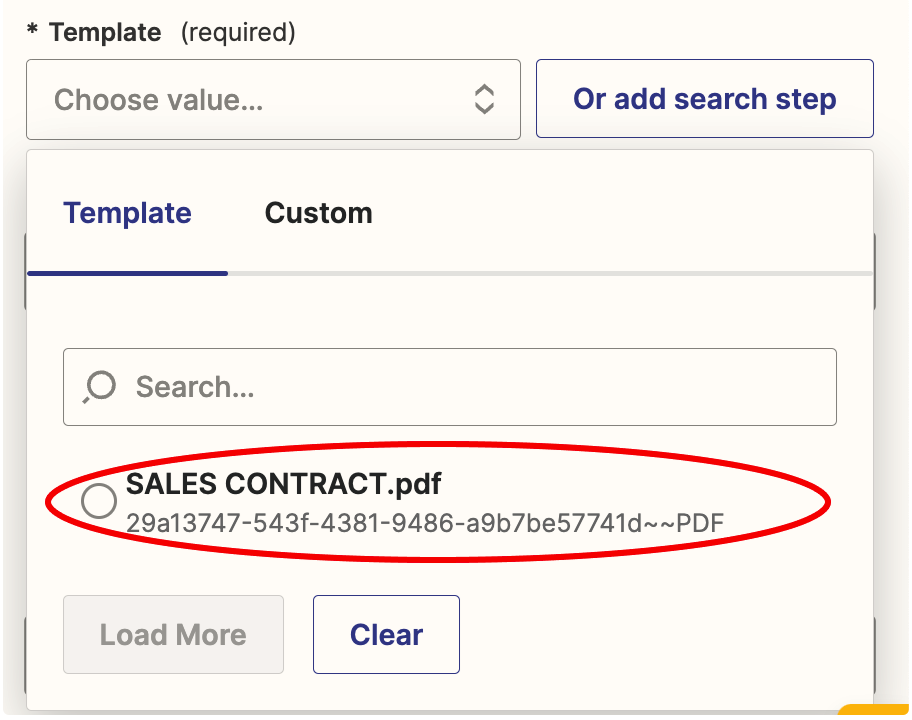
If you chose the right folder you should see the template you want there.
Now we can select the document name from the Pipedrive fields.
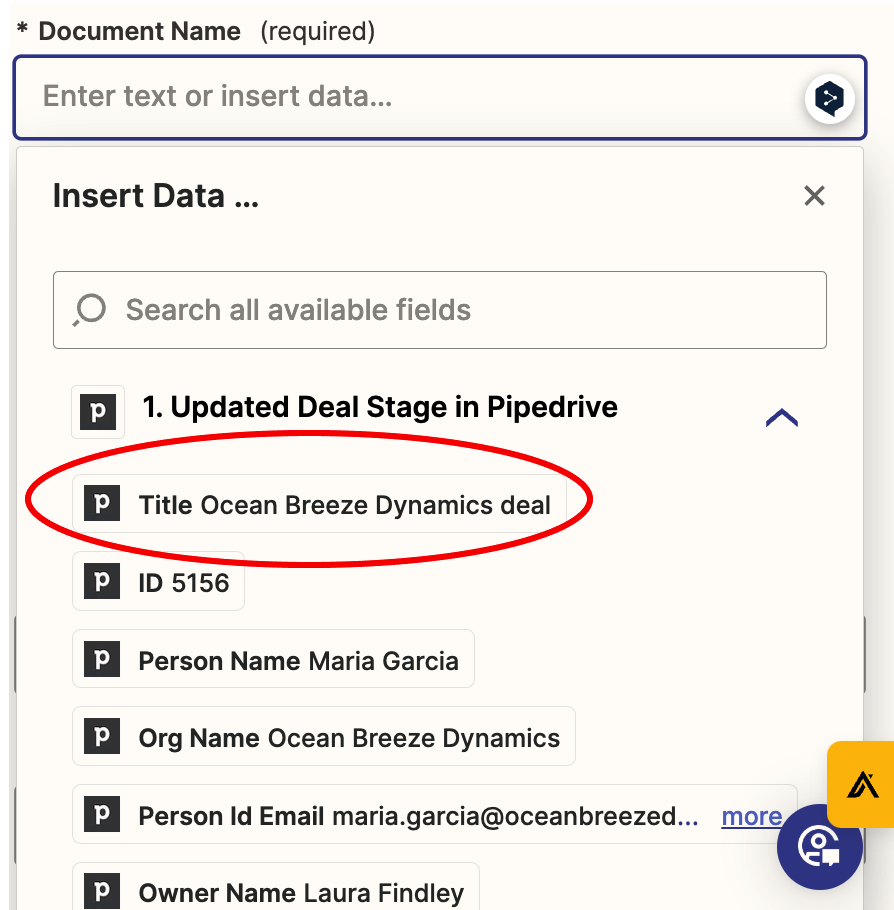
Here you can select basically anything you want, but I will select my deal’s title.
Now we have to decide if the document will be sent for signing immediately.
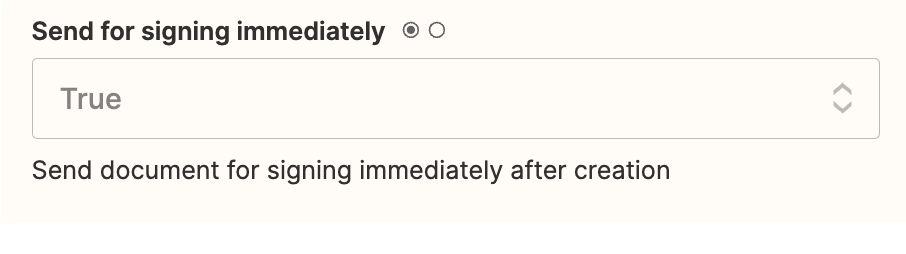
If you select “true” this means your document is sent immediately for signing to the other parties as soon as Zapier creates it.
If you select “false” it will mean the contract will stay in the “approved” state in Agrello so you can review it.
I am going to select “false” as I want to review the contracts.
Now we have to select the output type.
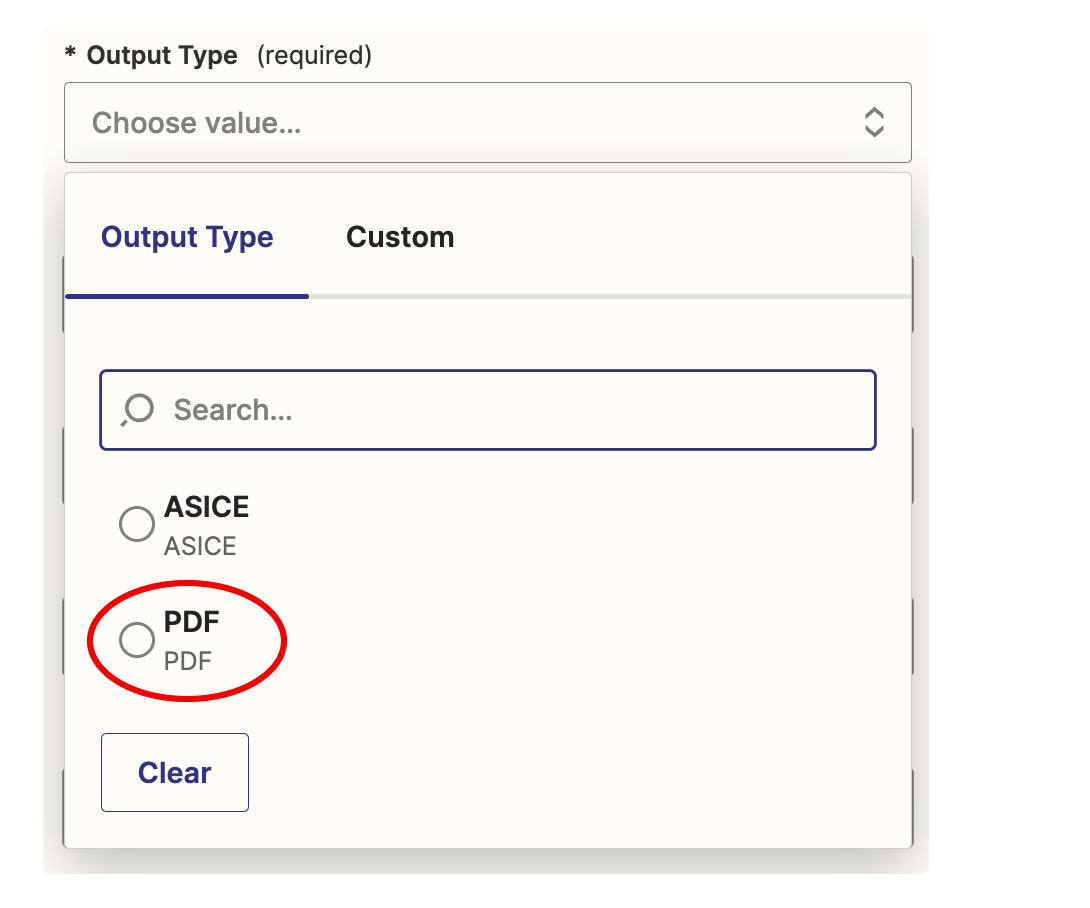
There are two options here as you can see:
There are two options here as you can see:
PDFs can be signed with multiple signature methods, including the Agrello’s native signature, Baltic specific signatures such as Smart ID and Mobile ID and others like Swedish BankID.
ASICE file types can only be signed with Baltic Smart ID, Mobile ID or national eID card.
If you’re conducting your sales contracts across a lot of international borders, it’s probably best to select PDF as your output type. This will also give you a PaDES verified document.
If you’re conducting your sales within the Baltic states, you can select either PDF or ASICE.
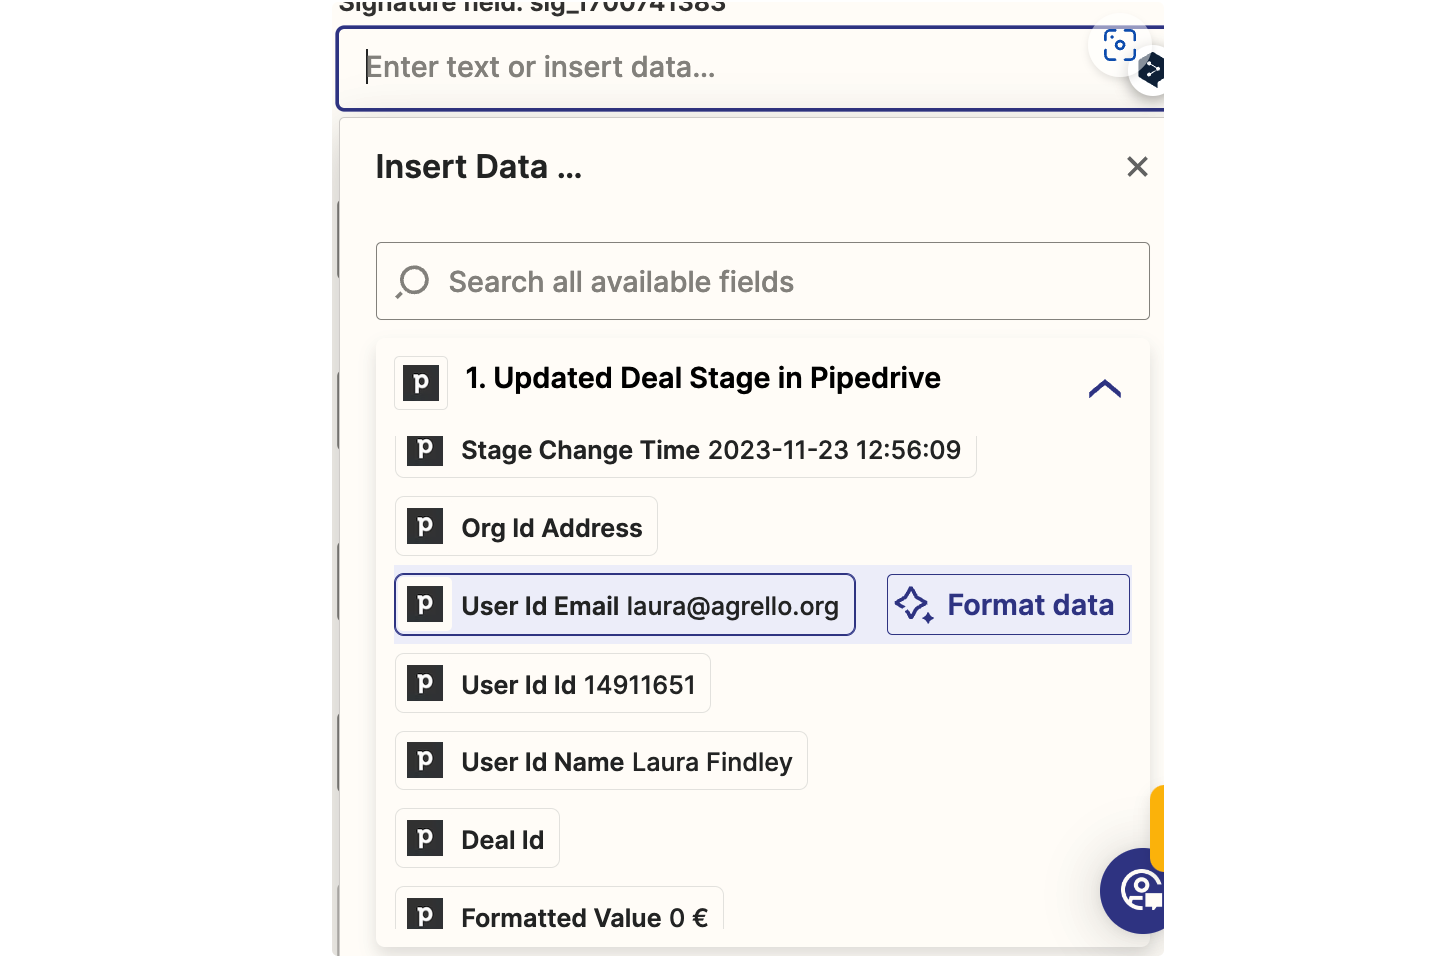
The next couple of fields here are our signing fields.
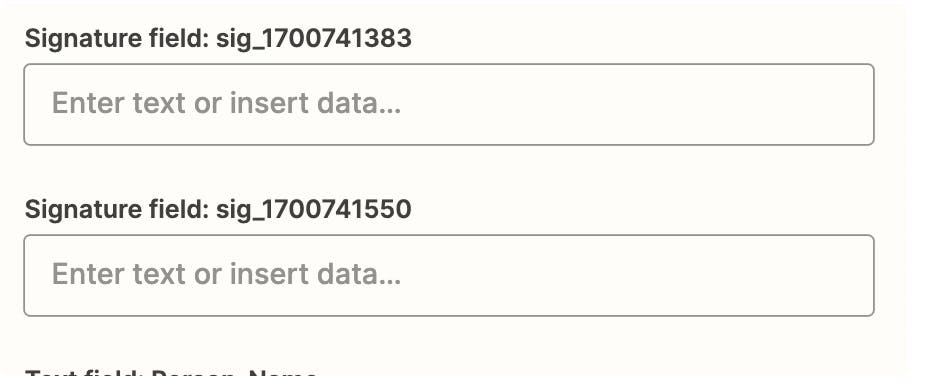
Here, we want to find the Pipedrive fields that correspond to the emails of the signers. For the top signature field I scrolled down to find my email address.
For the bottom signature field, I’ve found and selected the “person ID Email” field from the deal in Pipedrive.
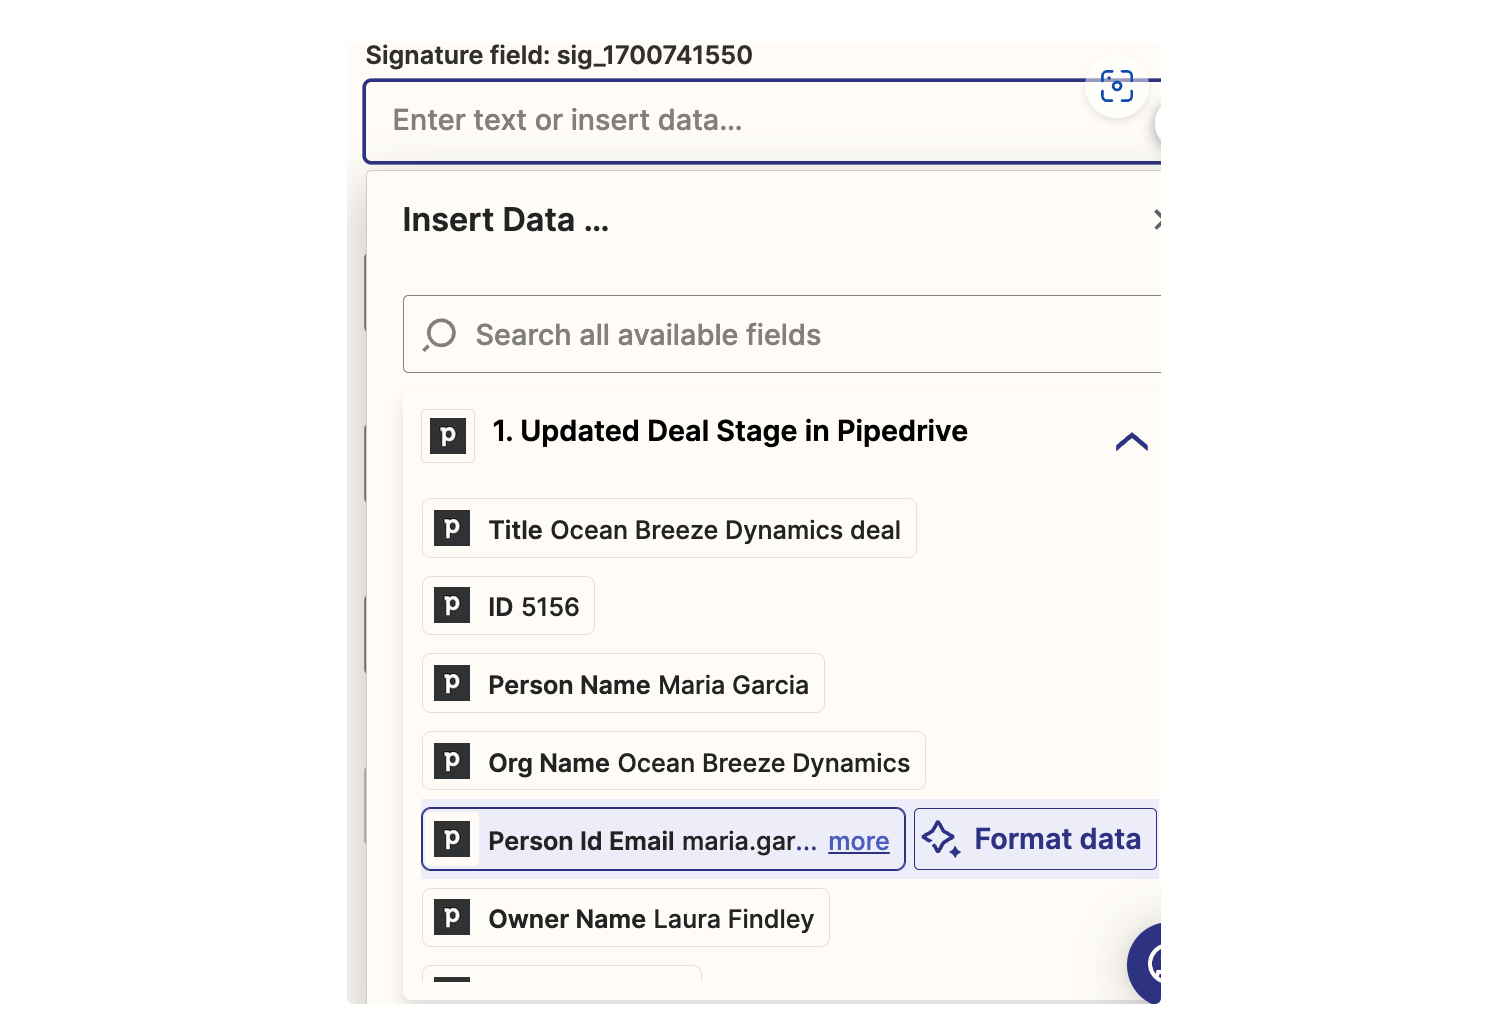
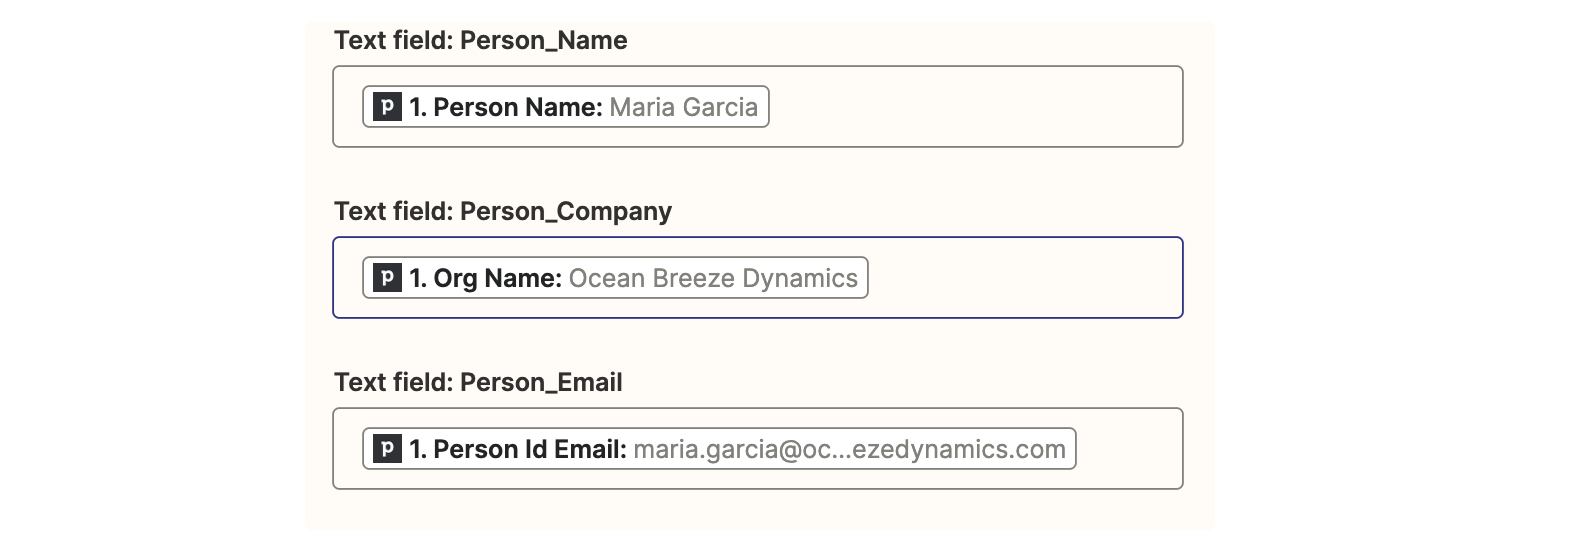
The next few fields follow the same logic. Selecting the fields from Pipedrive that match up to the fields in the document.
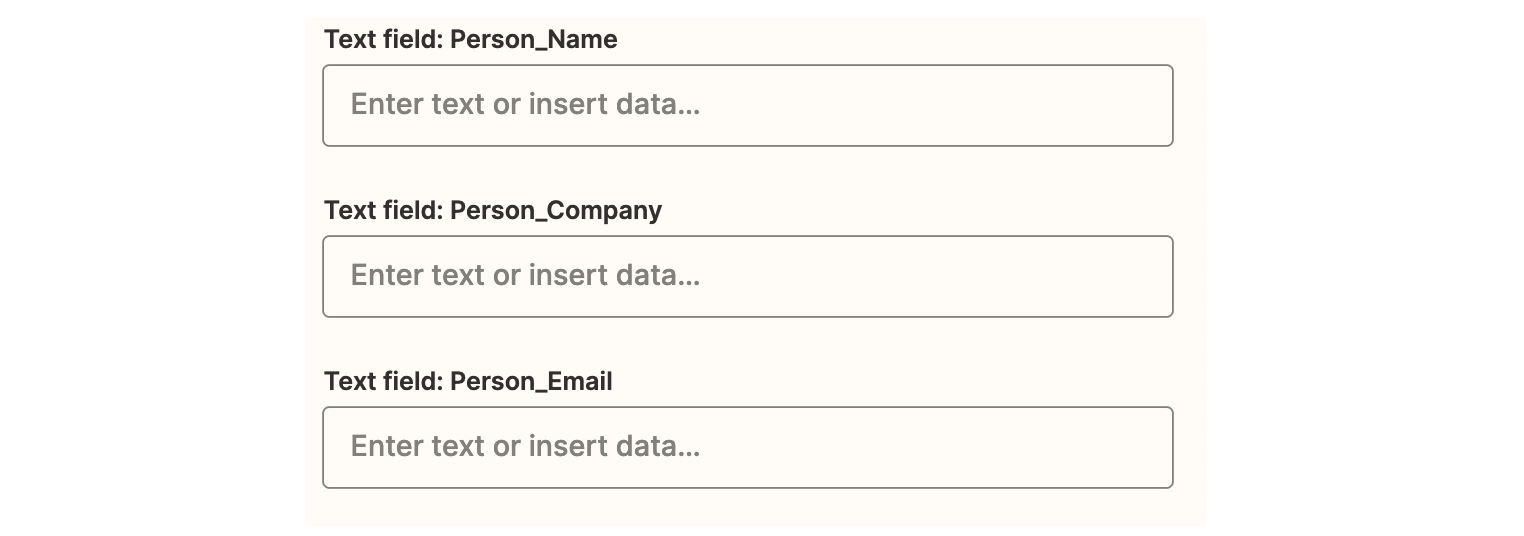
When it’s filled in it should look something like this:
There are a couple of additional fields here:
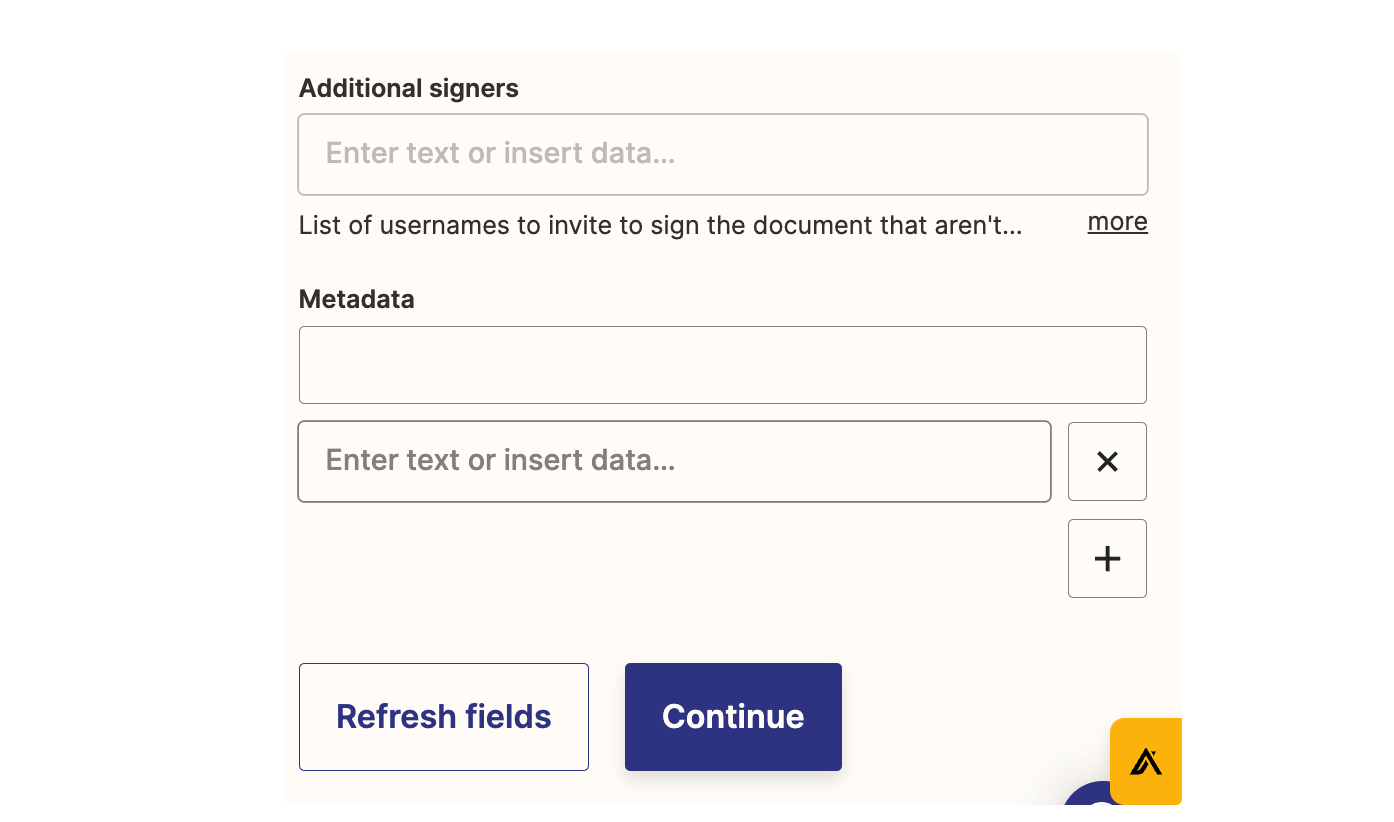
We can add additional signers, or metadata. However for the purposes of this example I will be ignoring this. That’s for a later tutorial. We can just click continue!
Now we need to test the step.
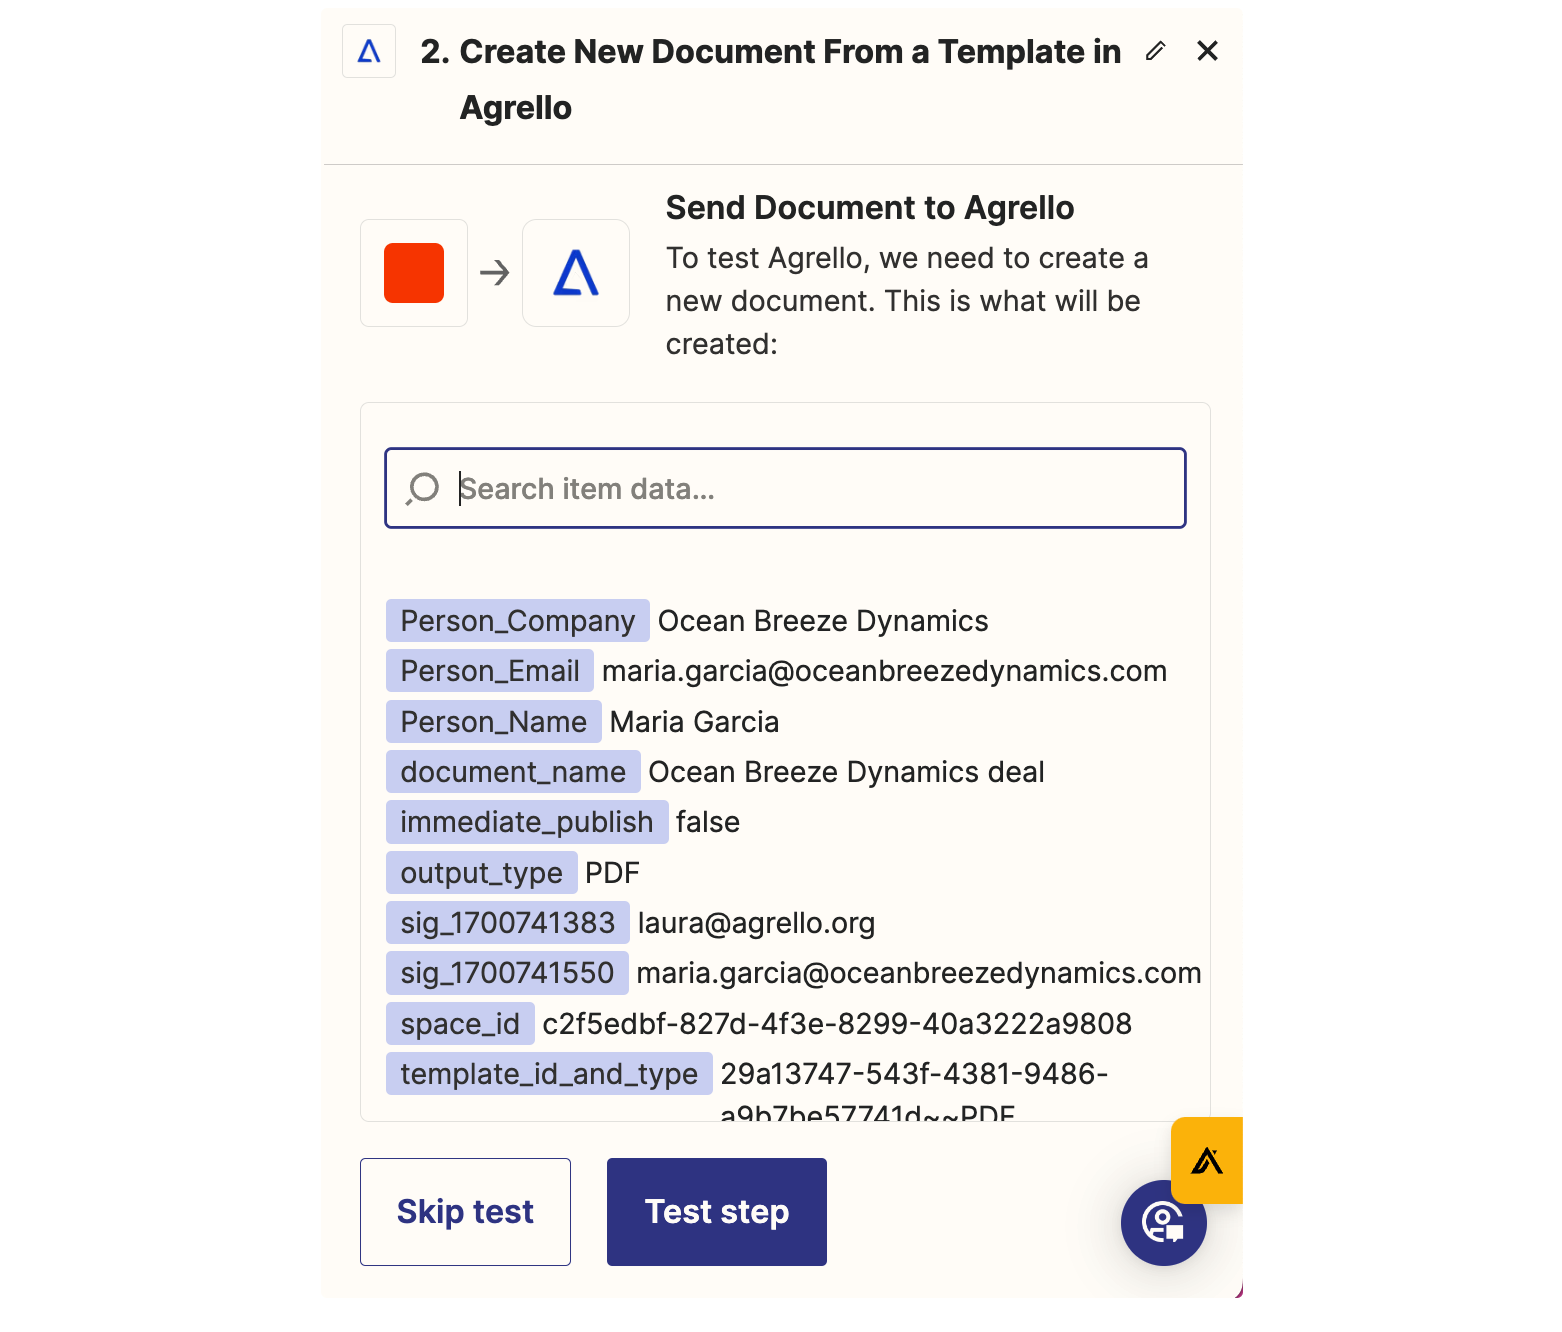
Just like before when we tested the Pipedrive step, we just hit “test step” and let Zapier work its magic.
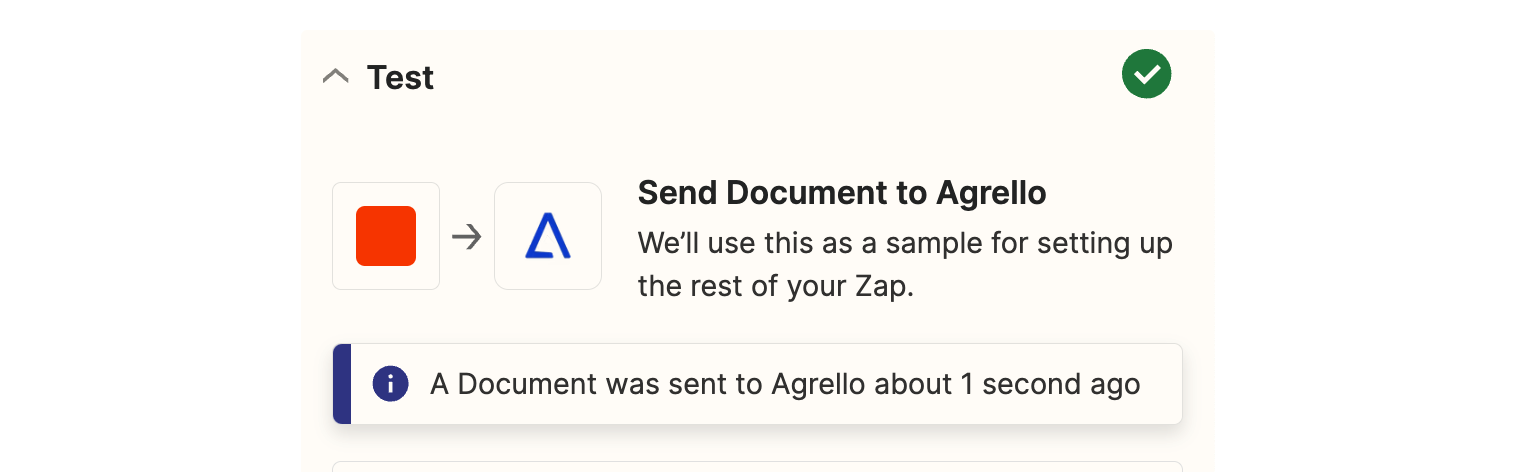
When the test is successful, we get a nice green tick, and a confirmation message that a document was sent to Agrello.
Let’s jump over to the Agrello platform and double check everything worked.
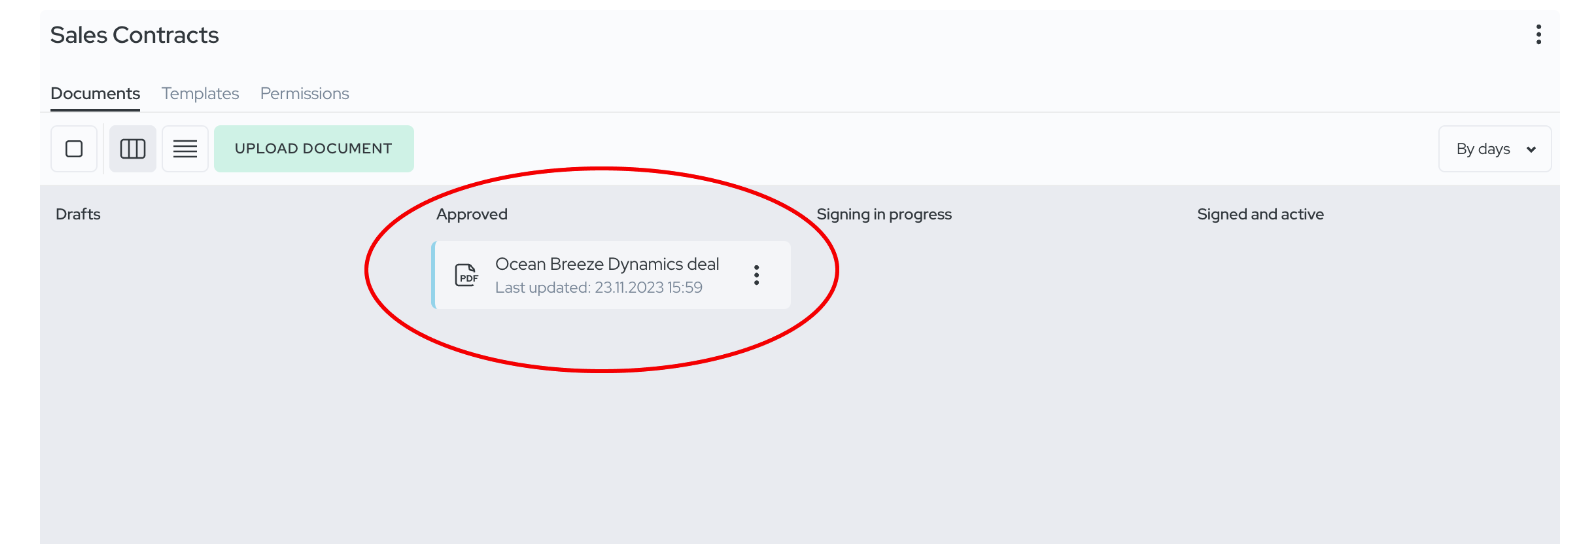
Here we can see in progress view that it did! And let’s look into the document to see if everything is correct there.
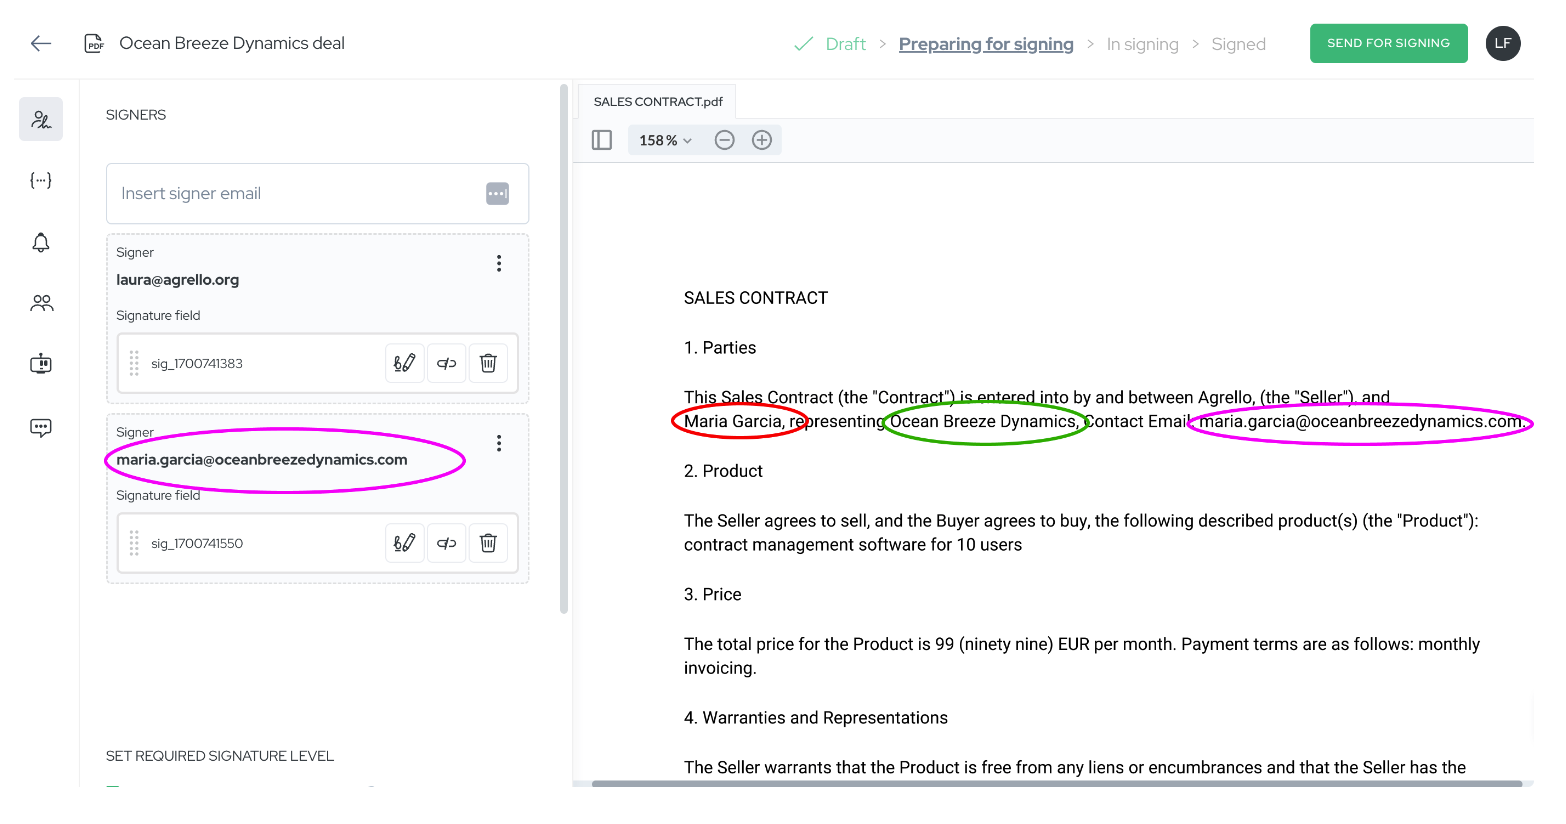
Here I’ve highlighted all of our fields and signers to show you that everything worked.
We can see that everything is correct in the fillable fields, and with the signer emails.
Now all we have to do is hit “send for signing” once we’re ready to send it to Maria.
Now we’ve confirmed that everything has worked correctly, the last thing to do is to publish the Zap. This means it will work for us whenever the deals in that pipeline in Pipedrive are moved to the stage we outlined in the Zap.
First, you can name your Zap, as right now it’s just “untitled”.
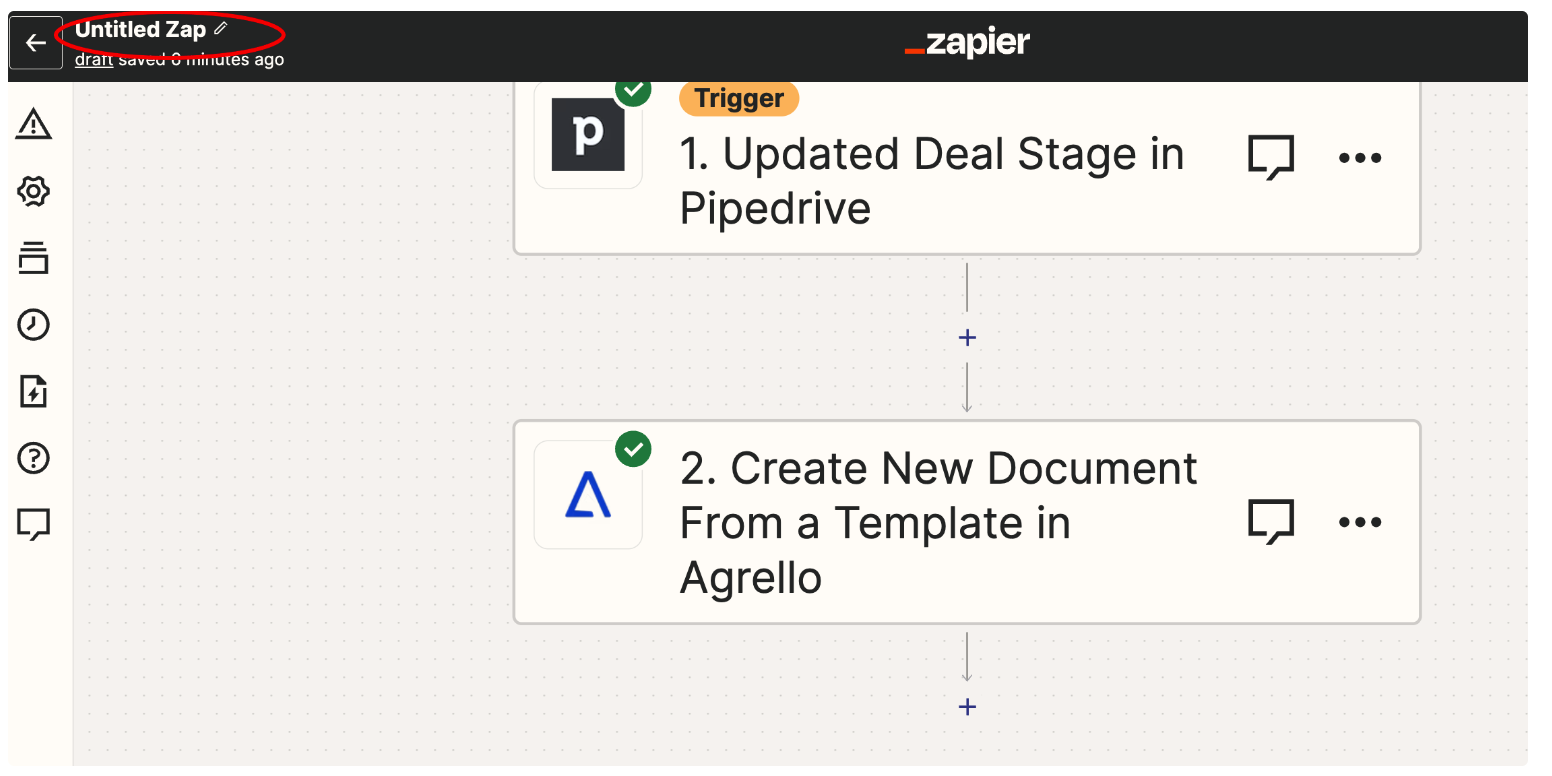
I chose to name mine “Sales Zap Pipedrive Agrello” but you can name it anything sensible that you feel. Or not sensible, do what you want.
Now that we’ve named it something, we can hit “publish” up in the right hand corner.
Now we will go from the editor, into the live screen.
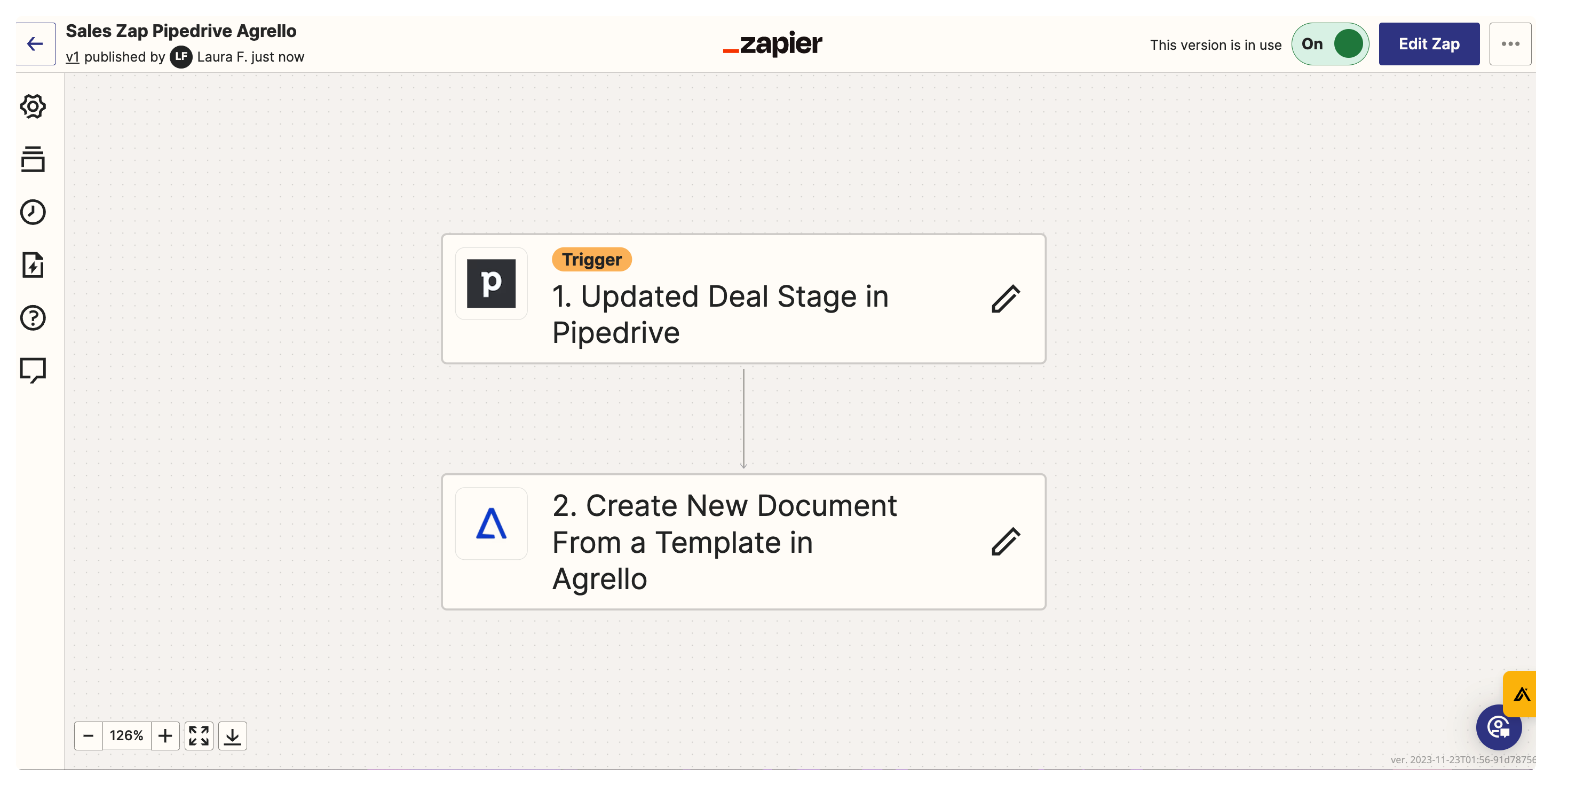
Here we can see it’s on. Now it will work for me whenever I add a deal to the “contract signing” pipeline stage, and create contracts for me automatically.
I hope you enjoyed this look at how to connect Pipedrive with a Agrello’s e-signing tool. If you have any questions about Agrello, or Agrello and Zapier you can reach out here.
Please note that if you experience any error codes in Zapier, related to the Agrello side of things, contact us and we will help you out.
If you have any general questions about Agrello, you can email me at laura@agrello.org.
Happy automating!

